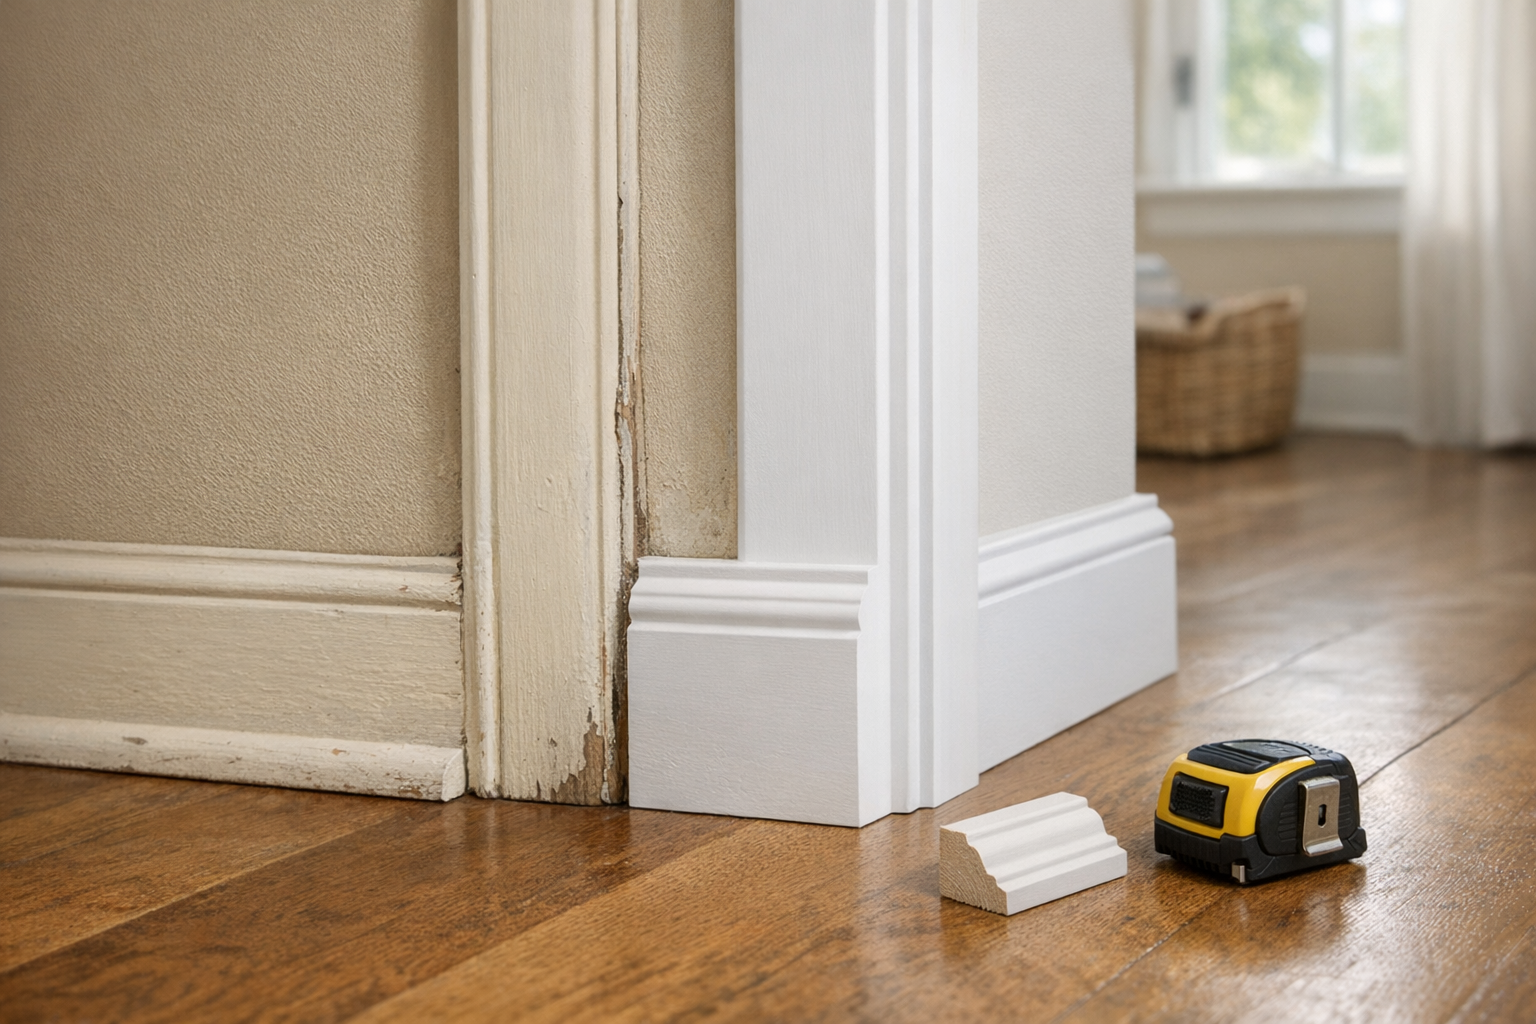

Paint is the finish that makes trim feel complete, but it is not a magic cover-up. On well-prepped trim, paint creates a clean, continuous look across baseboards, casings, window trim, and built-ins. On rushed prep, that same paint can draw attention to shadows, ridges, open seams, missed nail holes, lumpy filler, and uneven caulk lines.
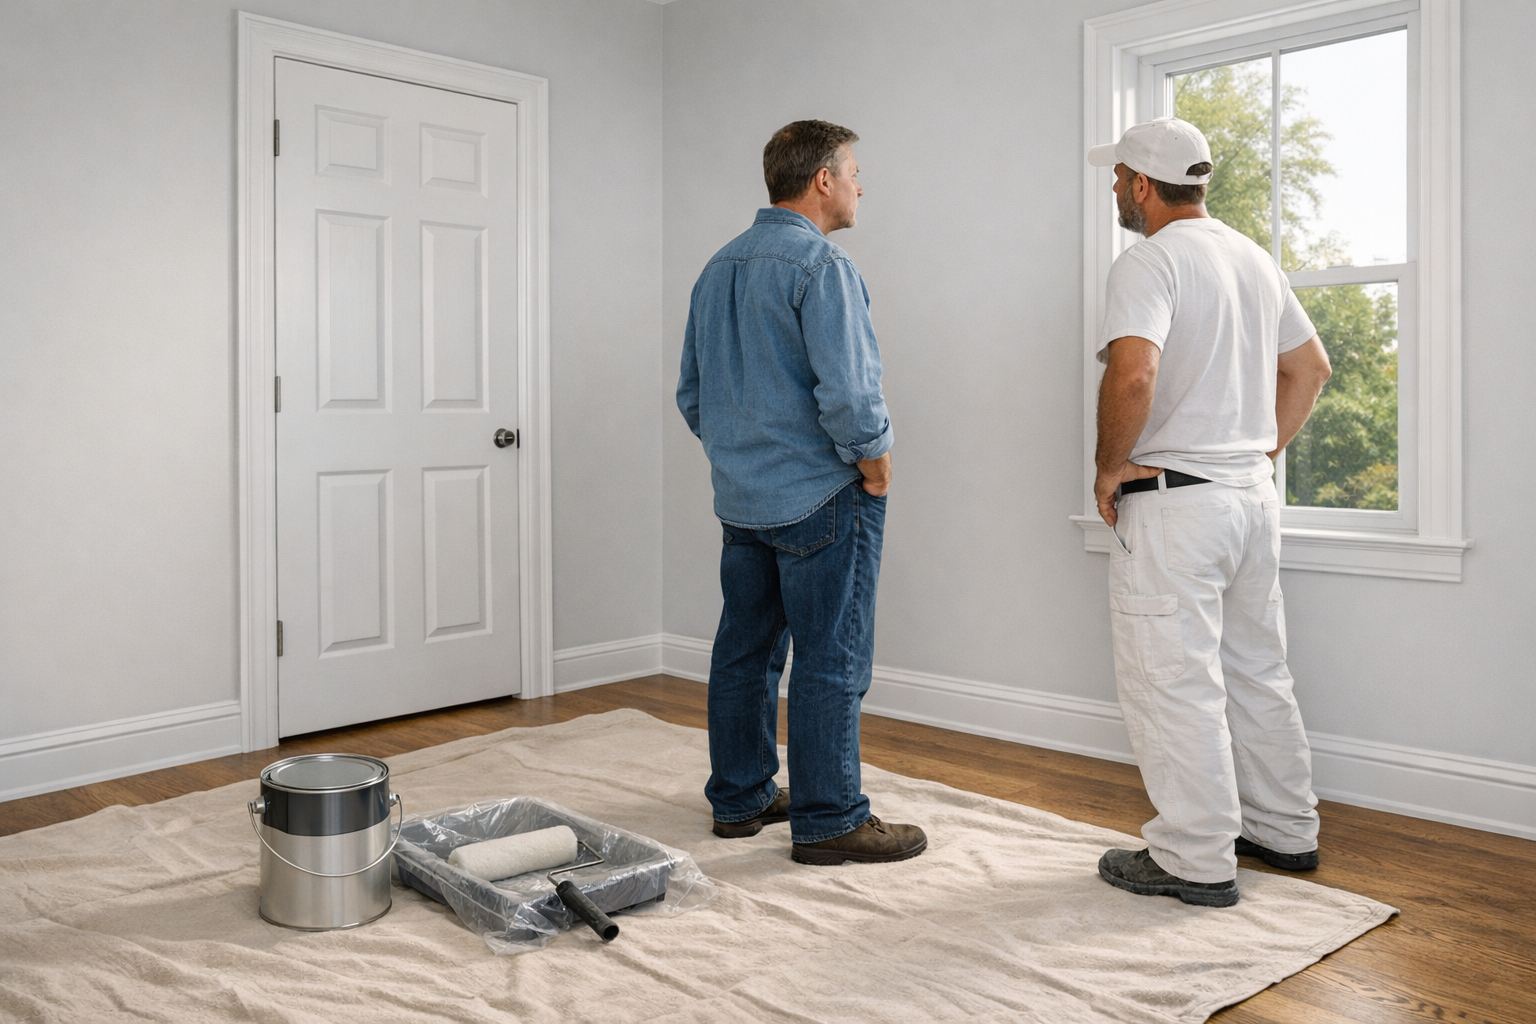
That is why a pre-paint trim walkthrough is worth doing before the first coat goes on. At this stage, most issues are still visible and easier to discuss: a small gap at a miter, a nail hole that was skipped, a caulk bead that stops short, or a rough outside corner that will catch the light. Once primer and paint begin, those details can become harder to separate from the painted surface.
This walkthrough is not meant to be a full carpentry inspection. You are not trying to diagnose framing, measure every angle, or judge hidden installation work. The goal is a surface-level trim inspection before paint: looking at the visible areas that will affect the final appearance from normal living-room, hallway, bedroom, and kitchen viewpoints.
It also helps to set the right expectation for paint-grade trim. Paint-grade trim is meant to be filled, caulked where appropriate, sanded, primed, and painted so it looks clean and consistent. It is not the same standard as stain-grade furniture or a custom cabinet door viewed inches away under perfect light.
Some small tolerances, slight wall irregularities, and normal finishing touch-ups are part of the process. What belongs on the punch list are the obvious items: open gaps, rough seams, raised filler, visible nail holes, ragged caulk, chipped edges, crooked-looking transitions, or anything that will likely stand out after paint instead of blending into the finished trim.
Before You Start: How to Walk the Trim Like a Finisher
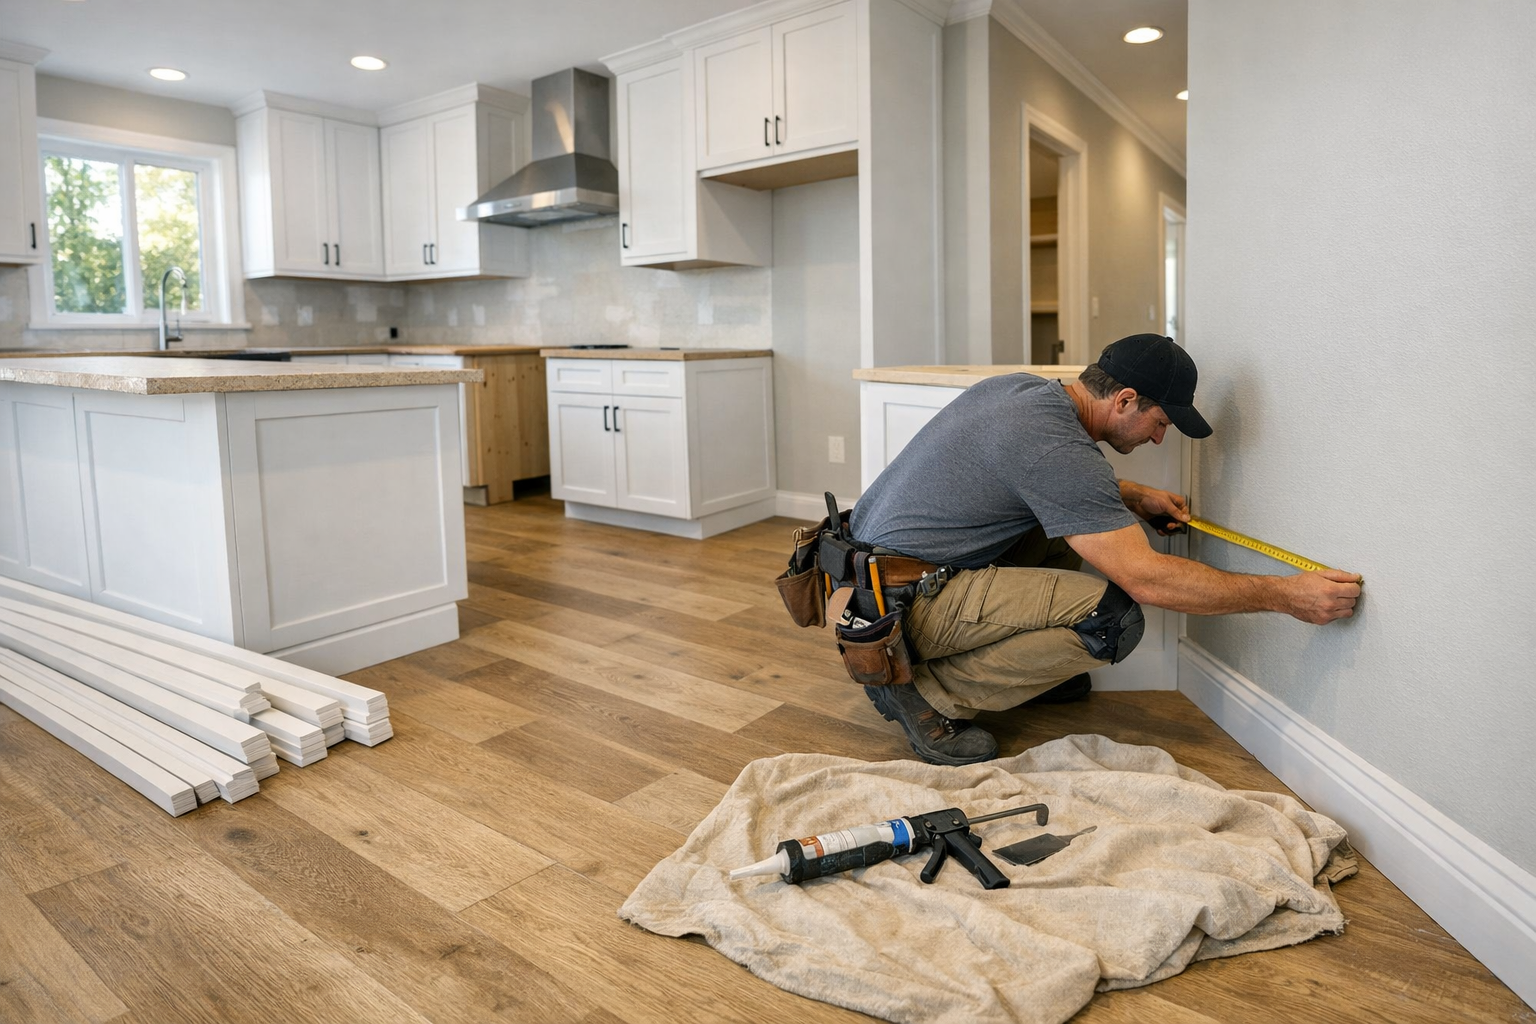
Start with a simple route instead of wandering from spot to spot. Pick a doorway, then move around the room in one direction so you do not skip a wall, window, closet opening, or built-in. This keeps the pre-paint trim walkthrough calm and consistent, more like a final scan than a hunt for perfection.
Use two kinds of viewing. First, stand where you normally would in the room and look at the trim as part of the whole wall: baseboards along the floor, door casing around openings, window casing, crown molding at the ceiling, and any built-ins. Then step closer at touch points, such as doors, windows, stair trim, and cabinet-style trim, where small ridges, gaps, or rough spots are easier to notice.
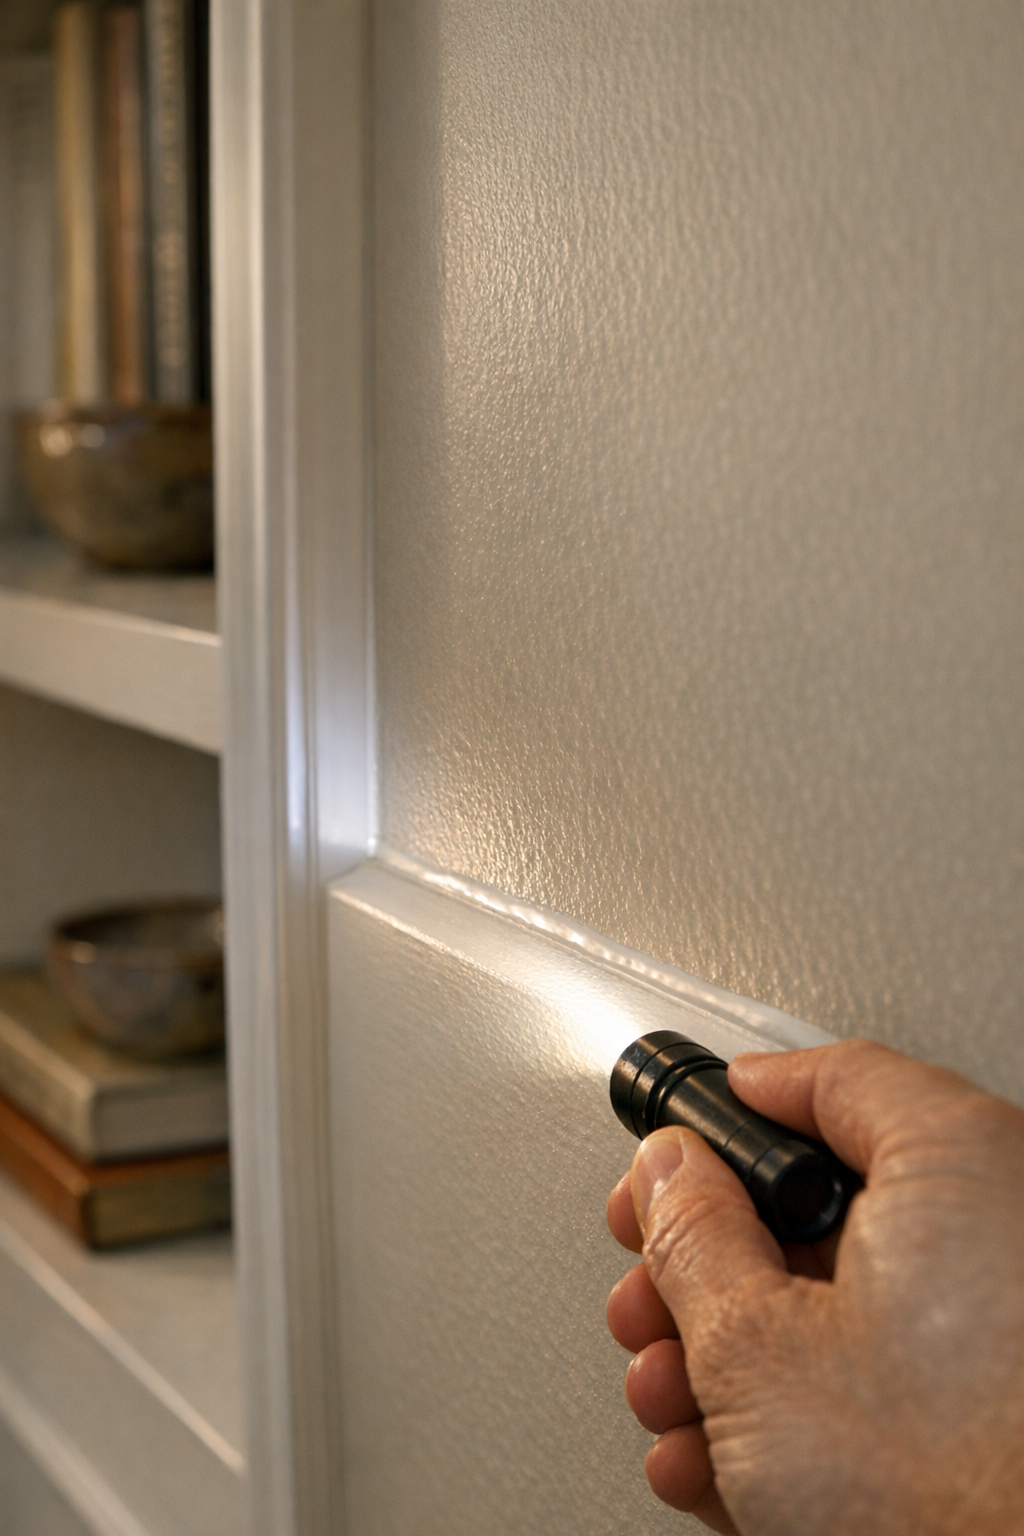
Lighting matters. Daylight gives you the everyday view, while a flashlight held low and along the trim can throw shadows across raised filler, dents, uneven seams, and missed nail holes. You are not trying to make every tiny shadow a problem; you are using the light to separate normal prep marks from areas that still look rough or unfinished.
Include the smaller pieces too. Shoe molding and quarter round are narrow strips near the floor, so they can hide gaps, short cuts, or uneven transitions until paint makes the line continuous. Built-ins, if present, should be part of the same interior trim finishing pass because their edges, panels, and wall connections are usually painted with the rest of the trim.
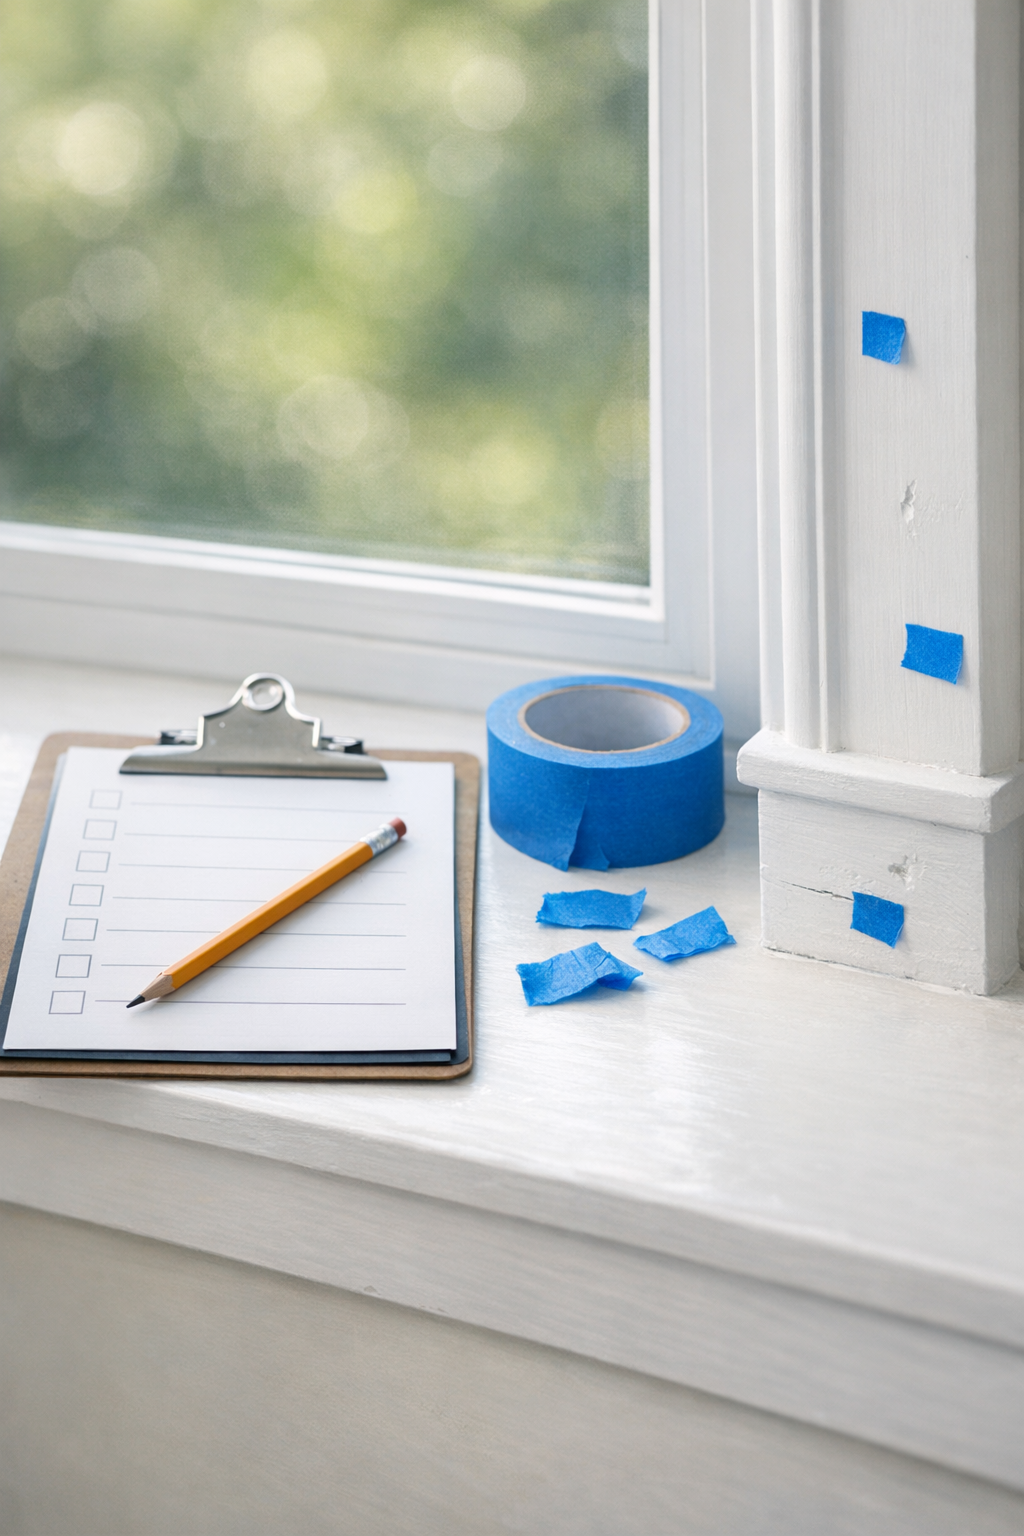
Mark items lightly with painter's tape or record them in a notes app by room and location. A useful trim finishing checklist might say "living room, left window casing, lower right corner" instead of "window looks bad." Clear notes make the next conversation easier and keep the focus on visible touch-ups before painting starts.
Check Nail Holes, Dents, Sanding, and Surface Smoothness
Run your fingertips lightly over the face of the trim, especially along door casing, window casing, baseboards, and any narrow molding near the floor. Your eyes will catch obvious marks, but touch often catches the small raised dots, shallow craters, and rough sanding patches that can show through paint.
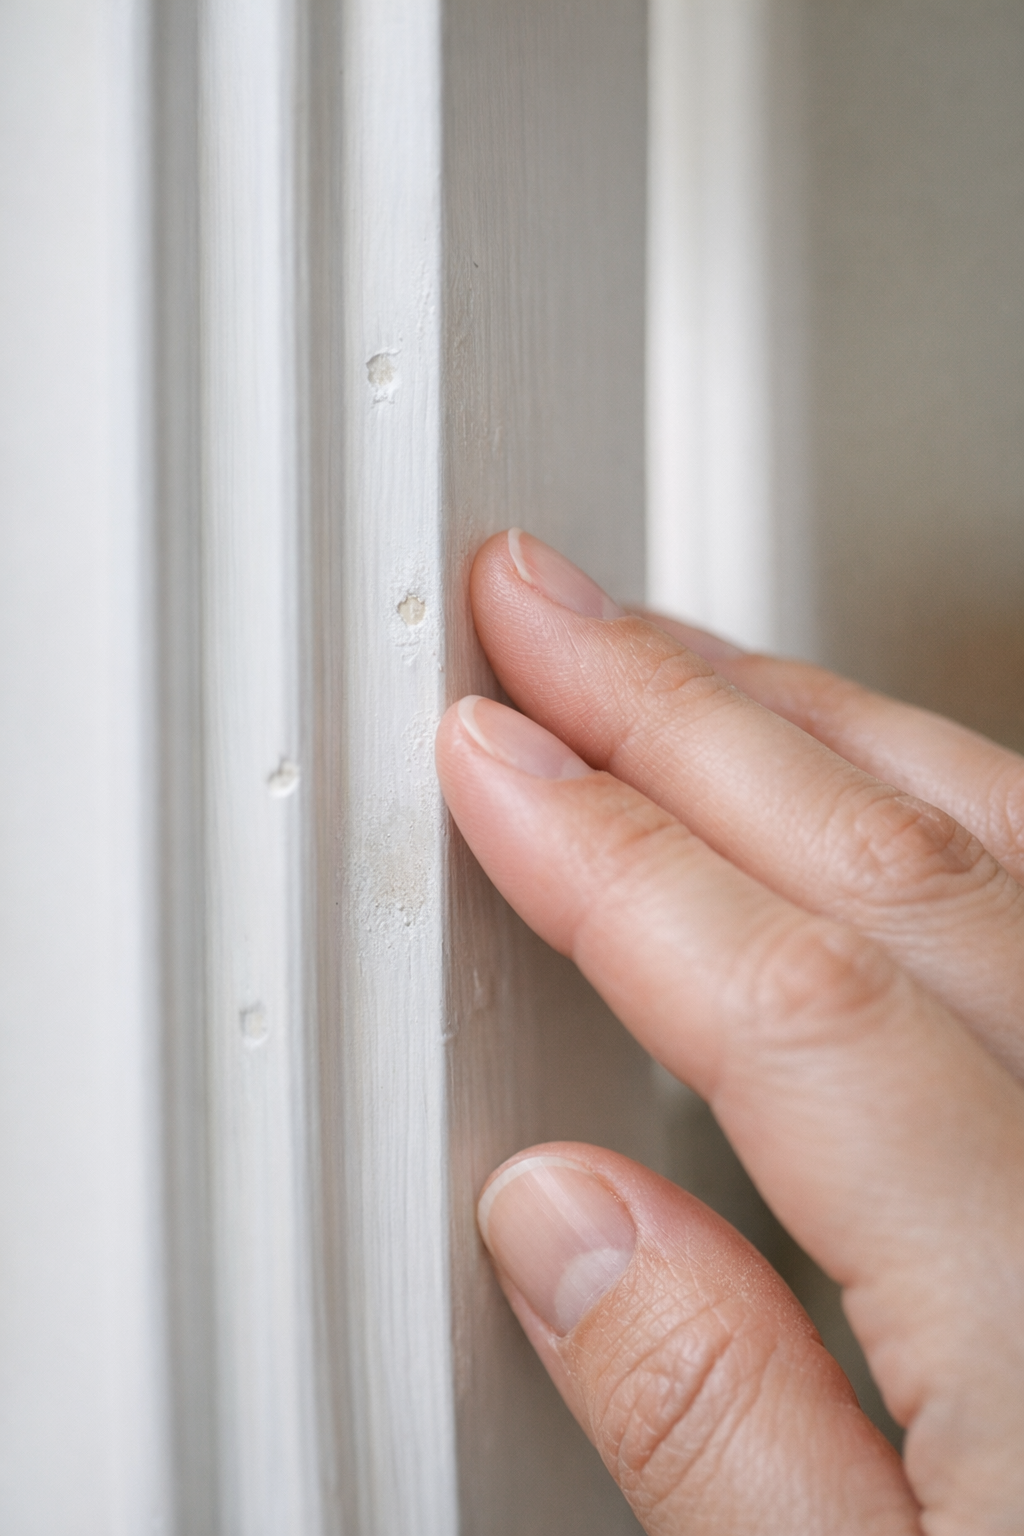
For nail hole filling, the good sign is simple: the holes are filled flush, smooth to the touch, and not shaped like tiny dimples or bumps. Some filler may be a different color than the trim before primer or paint, and that is usually less important than texture and levelness. A weak sign is a visible dark nail head, an open pinhole, a sunken filler spot, or a raised blob that has not been sanded flat.
- Look for dents and chips: Small dents, crushed corners, and chipped trim edges can become more noticeable once the paint creates a clean, even surface around them. Add them to the punch list when they interrupt the line of the trim or catch light from normal viewing angles.
- Check sanding quality: Filled holes often still need sanding before primer or paint. Good sanding feels smooth and blends into the surrounding trim. Weak sanding leaves scratches, ridges, fuzzy edges, or obvious rough patches.
- Watch for saw marks and rough cuts: Ends, short returns, and small trim pieces can show rough saw texture. If the edge looks torn, splintered, or uneven, it may need touch-up before it reads as paint-ready trim.
- Notice pencil lines and layout marks: Light marks may disappear under proper prep, but dark or repeated layout marks are worth flagging if they remain visible on the finished face of the trim.
- Check for dust: A dusty surface can make trim look less ready for paint. If wiping a finger across the trim leaves a visible trail, note the area for cleaning before coating begins.
Keep this part of your trim finishing checklist practical: flag what you can see or feel, not every microscopic pore in the wood or filler. The goal is a surface that looks even from the room and feels smooth where hands, light, and paint will reveal the prep work.
Inspect Seams, Joints, Corners, and Returns
At the places where two trim pieces meet, look for shape and shadow as much as the actual gap. Trim seams before painting do not always need to be invisible at this stage, but they should look controlled: tight enough to be filled or caulked cleanly, with the profiles meeting without an obvious step.
- Seams on straight runs: These are the joints where two pieces of baseboard, casing, or molding meet end to end. A good sign is a narrow, even seam with both faces sitting flush. Flag daylight-visible gaps, one piece sitting proud of the other, or a joint that creates a sharp shadow line from across the room.
- Miter joints: These are angled cuts, often found at picture-frame-style door and window casing or outside corners. The two angled ends should meet cleanly so the corner reads as one continuous frame. Small hairline seams may be normal before final filling, but wide V-shaped openings, chipped tips, or mismatched trim profiles belong on the punch list.
- Cope joints: These are shaped joints often used where one trim piece meets another at an inside corner. Instead of two simple angled cuts, one piece is cut to follow the face profile of the other. What matters to you as the homeowner is whether the shaped edge sits neatly against the adjoining trim without a ragged gap or crushed-looking profile.
- Inside corners: These are corners where two walls meet, such as baseboard running into a room corner. Look for gaps that are unusually wide, uneven, or jagged. A slight line may be handled during finishing, but a corner that looks broken, twisted, or poorly seated should be noted.
- Outside corners: These are exposed corners that project into the room, so damage catches the eye quickly. Check for cracked points, splintered ends, uneven heights, and edges that do not line up from one side to the other.
- Returns: A return is the small finished end piece where trim stops instead of running into another surface, such as the end of a chair rail, cap, or molding detail. It should look intentional, not like a raw cut. Flag returns that are missing, loose-looking, rough at the end, or out of line with the trim they finish.
For each issue, note whether it is a tiny finish seam or an obvious open joint. That distinction helps keep the walkthrough fair: small, even lines are often part of normal prep, while sharp gaps, proud edges, splintered corners, and mismatched trim lines are worth discussing before paint begins.
Review Caulk Lines Where Trim Meets Walls, Ceilings, and Built-Ins
Caulk is the detail that softens the line between trim and the surfaces around it. During your walkthrough, look at the places where trim meets drywall, ceilings, cabinets, bookcases, and other built-ins, not just the joints between trim pieces.
Typical spots for caulking trim include the top edge of baseboards where they meet the wall, the outside edge of door and window casing where it meets the wall, crown molding where it meets the wall or ceiling, and small stationary gaps around built-ins. The purpose is not to rebuild the shape of the trim; it is to close narrow shadow lines so the finished paint reads as one clean edge.
- Good signal: Trim caulk lines should look smooth, continuous, and thin. A paint-ready caulk bead bridges the small gap without looking bulky, rope-like, or flattened across the face of the trim.
- Weak signal: Flag skipped sections, cracks, pinholes, lumpy areas, dirt stuck in the caulk, or spots where the caulk has been smeared far onto the wall or trim face. Those marks can leave uneven texture after paint.
- Watch the edges: The cleanest caulk lines usually have a crisp edge on both sides. If the line wanders, gets thick in one area and thin in another, or leaves finger marks, it may need touch-up before final paint.
- Look at built-ins closely: Shelving, cabinet panels, window seats, and fireplace trim often create short inside corners and tight transitions. These areas should not have open dark gaps, but they also should not be packed with heavy caulk to hide poor fit.
Caulk is best suited for small, stable gaps. If a gap is wide, moving, uneven from one end to the other, or caused by trim that does not sit correctly, note it as more than a caulk touch-up. In your pre-paint trim walkthrough notes, describe the location and what you see: "mudroom bench, left side, lumpy caulk at wall," or "primary bedroom crown, ceiling line has skipped sections."
Check Alignment, Reveals, Long Runs, and Floor Transitions
Step back far enough to see the trim as a set of lines, not just individual joints. This is where small spacing changes, tilted pieces, and awkward stopping points tend to stand out, especially once one paint color ties the trim together.
A reveal is the narrow, consistent border of door or window jamb that remains visible beside the casing. In door casing paint prep, a good reveal looks reasonably even around the top and sides, so the casing feels centered and intentional. A weak signal is a reveal that gets noticeably wider on one side, disappears at a corner, or makes the casing look tilted from across the room.
Use the same idea for window trim paint prep. Look at the left and right sides, then the top line. The goal is not machine-perfect spacing on every older wall; it is a balanced look that does not pull your eye to one slanted side, one pinched corner, or one piece that seems out of rhythm with the rest of the opening.
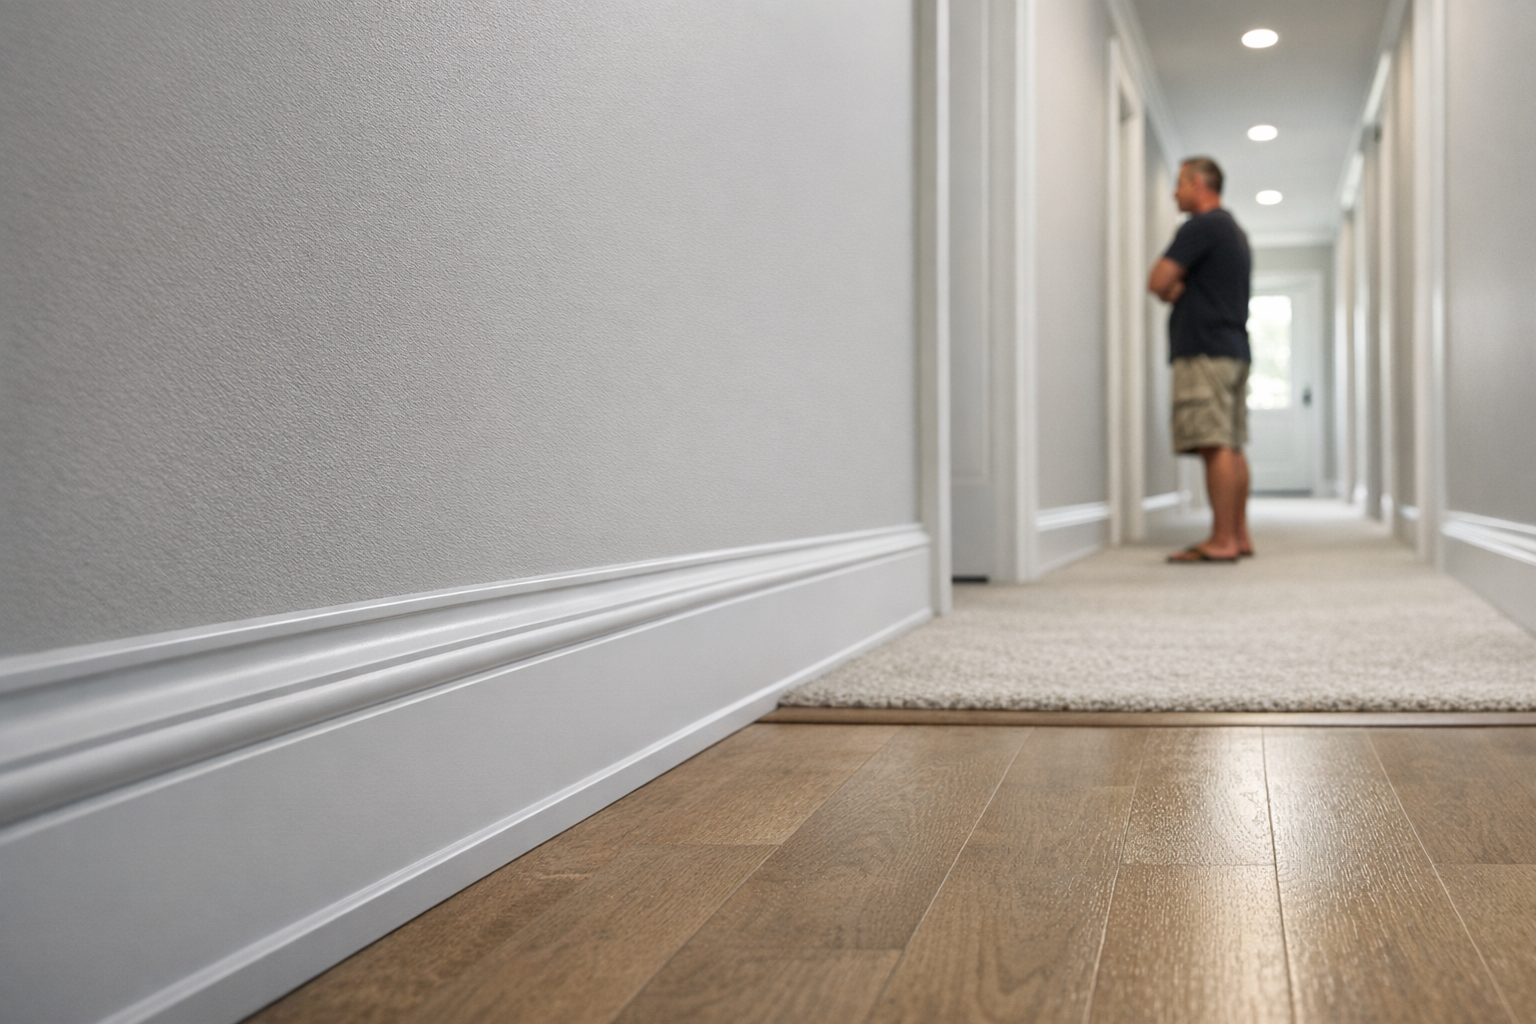
- Long runs: Sight down baseboards from a few feet away. A good run may follow a slightly imperfect wall, but it should still read as a clean horizontal line. Flag sections that visibly wave, bow out, dip sharply, or create a shadow that looks like the trim is not sitting consistently.
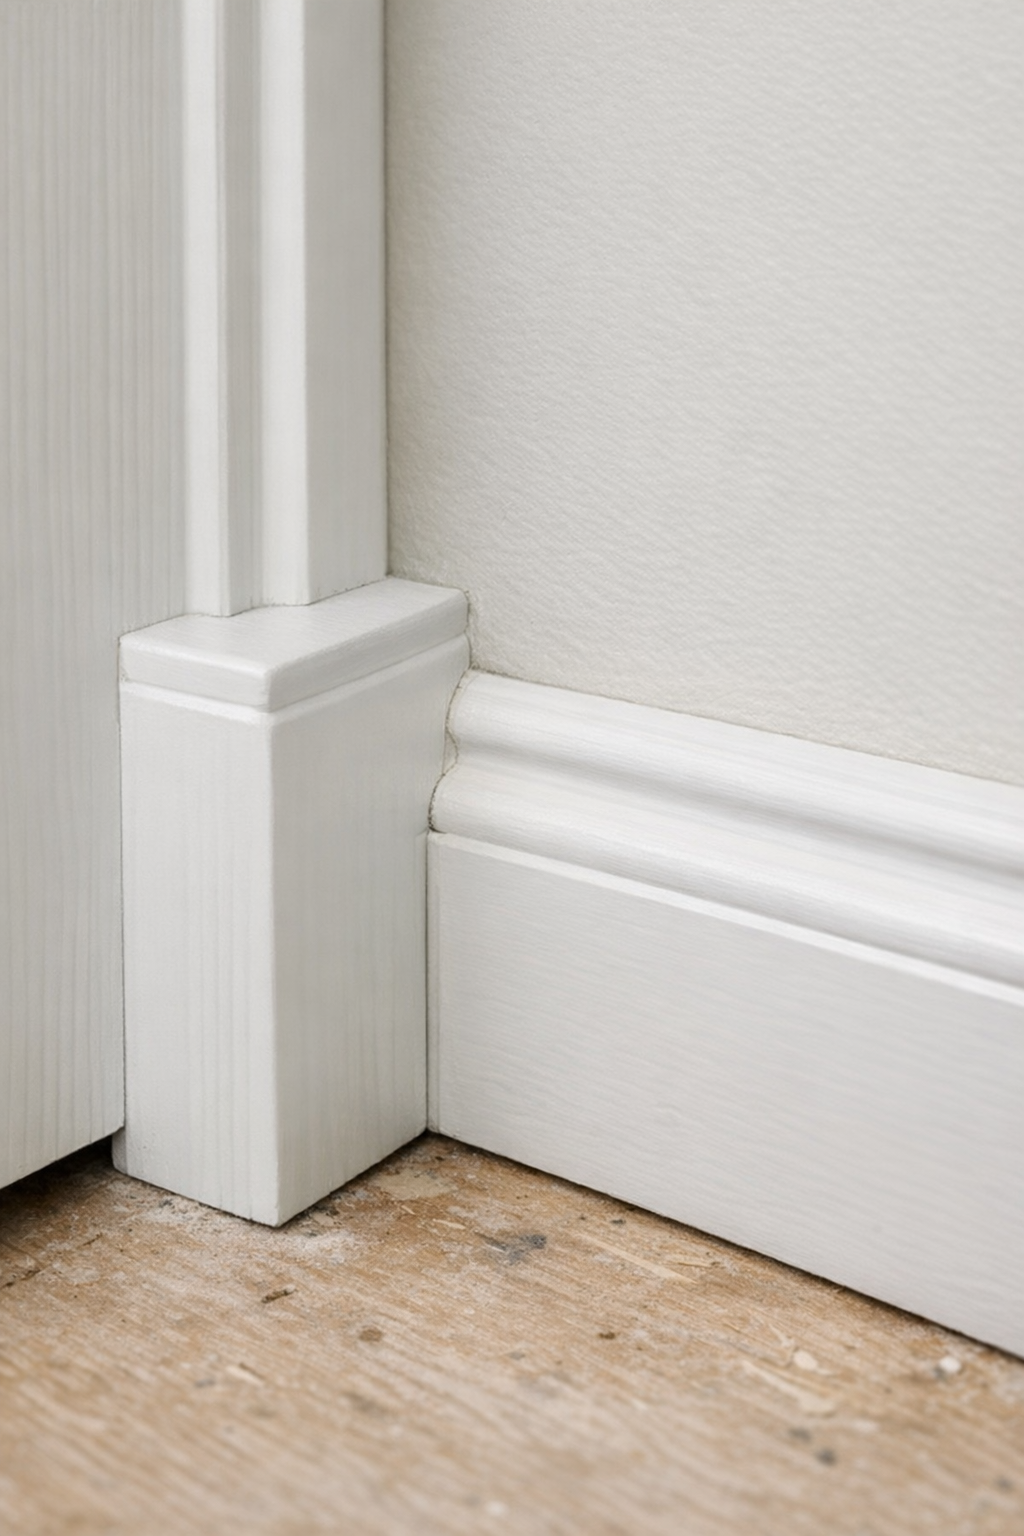
- Casing-to-base alignment: At doors, notice where the vertical casing meets the base trim. A good connection looks planned, with pieces meeting cleanly or ending in a deliberate block or return. A weak connection looks chopped off, offset, or crowded.
- Flooring changes: At tile, hardwood, carpet, stair edges, and thresholds, look for trim that stops with a clean endpoint. Flag pieces that die into flooring at a strange angle, leave an abrupt gap, or change profile without a visual reason.
- Cabinets and built-ins: Where trim meets cabinet panels, bookcases, benches, or fireplace details, the lines should feel coordinated. If one profile crashes into another or ends without a return, note it before paint makes the transition more obvious.
Keep this part of the pre-paint trim walkthrough focused on the places people naturally see: main doorways, hallway runs, stair areas, kitchens, mudrooms, and rooms with strong daylight. Walls and floors are rarely perfectly straight, so the practical question is whether the trim looks intentional from normal viewing distance or whether one line keeps grabbing your attention.
Build a Clear Trim Punch List Before Painting Starts
Turn your notes into a short, organized list that someone else can walk straight to without guessing. A strong punch list does not need fancy language; it needs enough detail to show the exact spot, the visible issue, and the correction you are asking the crew to review.
- Location: Name the room, wall, opening, and side when possible. For example: "primary bedroom, left window casing, open top miter" is much clearer than "window trim gap."
- Issue type: Group each note by what you saw: nail hole, dent, rough seam, open corner, missing caulk, uneven transition, return detail, or alignment concern. This helps the painter or finish carpenter sort prep work from carpentry touch-ups.
- Severity: Use simple labels like "must review," "visible from room," or "minor touch-up." Severity tells the crew what affects the finished look most, instead of making every small item seem equal.
- Photo: Take a close photo and a wider photo. Painter's tape, a sticky note, or a phone markup arrow can make the exact spot easier to find later.
- Requested correction: Keep it neutral and specific: "fill and sand nail holes," "review open miter before paint," "clean up caulk line," or "discuss uneven baseboard transition."
Prioritize the items paint will not hide: open gaps, rough seams, missing caulk, raised filler, chipped corners, and trim that looks out of line in high-visibility areas. Doorways, stair runs, kitchen trim, mudroom benches, hallway baseboards, and window trim in strong daylight usually deserve the first pass because people see and touch them often.
A useful paint-ready trim checklist also separates true prep issues from preferences. "Open outside corner with shadow gap" belongs on the list. "I wish this wall were straighter" may be normal material behavior or an existing wall condition. That distinction keeps the pre-paint trim inspection productive, fair, and focused on details that can realistically improve before the first coat.
Final Paint-Ready Check: What Should Be Done Before the First Coat
Before the crew opens a can, give your punch list one last pass and decide whether the trim looks ready for finish work or still needs correction. Paint-ready trim does not have to look painted yet, but it should look controlled, smooth, and intentional.
- Ready to paint: Nail holes are filled and sanded flush, with no obvious raised dots, craters, or rough filler patches catching the light.
- Ready to paint: Caulk lines are neat where they belong, especially along trim-to-wall edges, casing, baseboards, crown, and built-ins. The line should look smooth rather than torn, smeared, or skipped.
- Ready to paint: Seams, corners, and returns look closed enough for a clean finish, with no sharp shadow gaps, missing end pieces, splintered edges, or proud joints that will stand out after paint.
- Ready to paint: Long runs, reveals, and transitions look acceptable from normal viewing distance. Slight wall or floor irregularities may still exist, but the trim should not look loose, crooked, unfinished, or accidentally stopped.
- Ready to paint: Surfaces are clean enough for the next step, without obvious dust piles, loose debris, pencil marks, or chunks of dried filler sitting on the face of the trim.
Pause painting and ask for corrections when you see open joints, missing returns, large uncaulked gaps, loose trim, rough filler, visible damage, or transitions that still look unresolved. Those are the kinds of items that can become more noticeable once the first coat ties everything together.
Minor pinholes, light sanding touch-ups, or small caulk adjustments may be handled during normal paint prep, especially if they are already on the crew's radar. The value of a final pre-paint trim walkthrough is simple: it gives everyone one clean moment to address visible issues before paint turns preparation into the finished look.