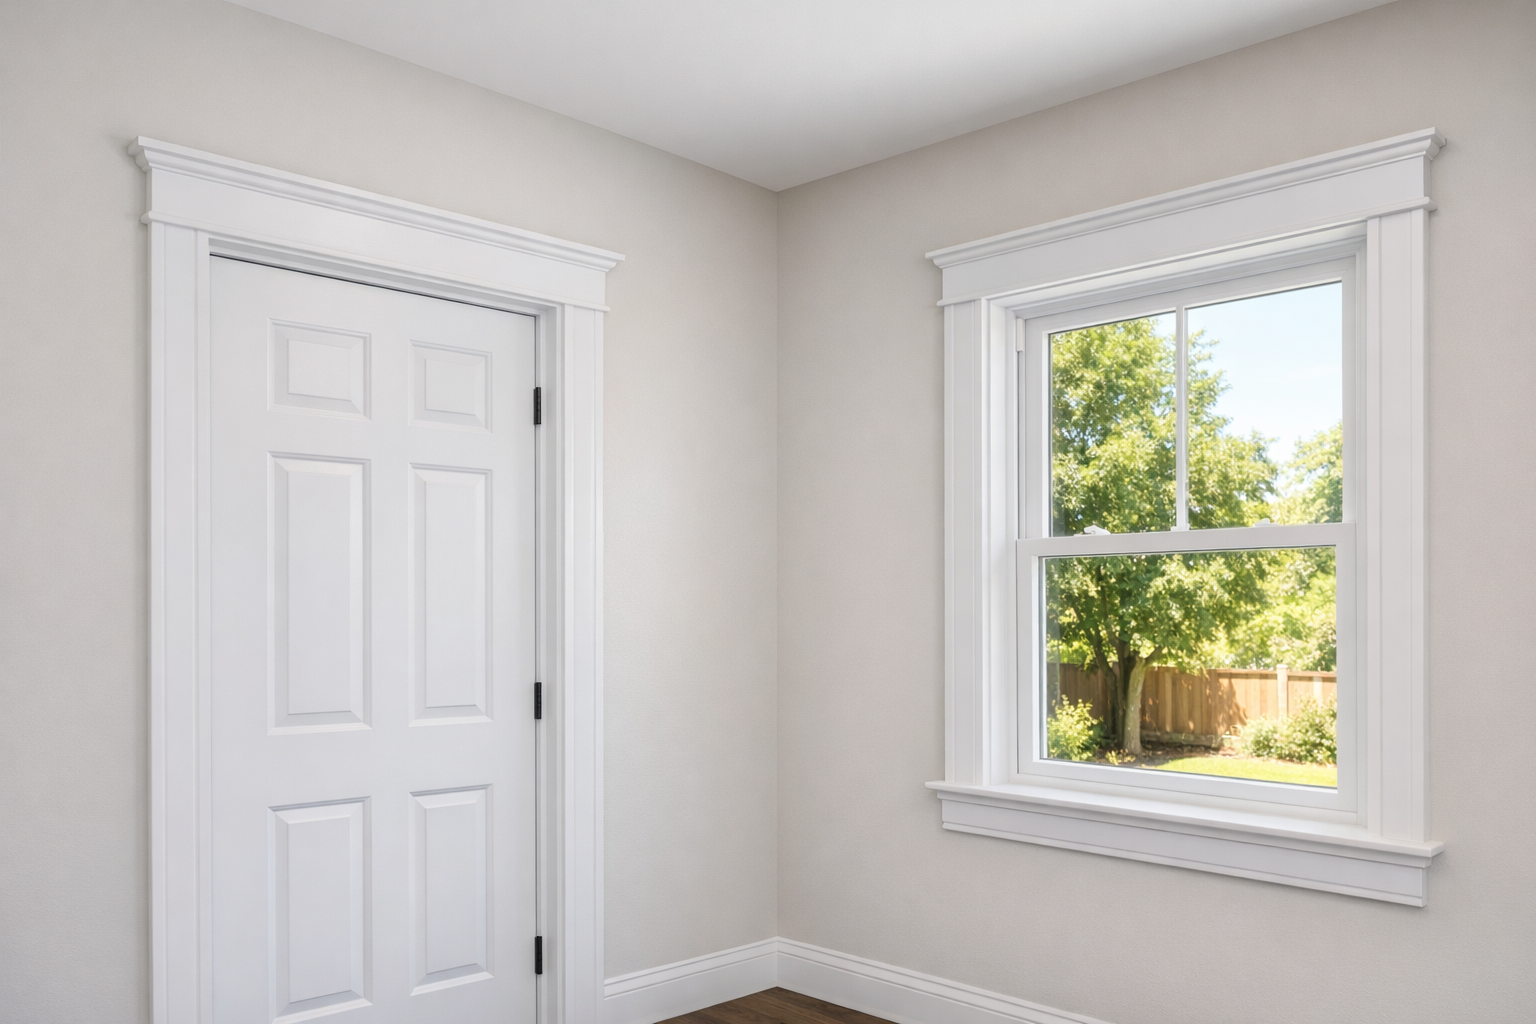
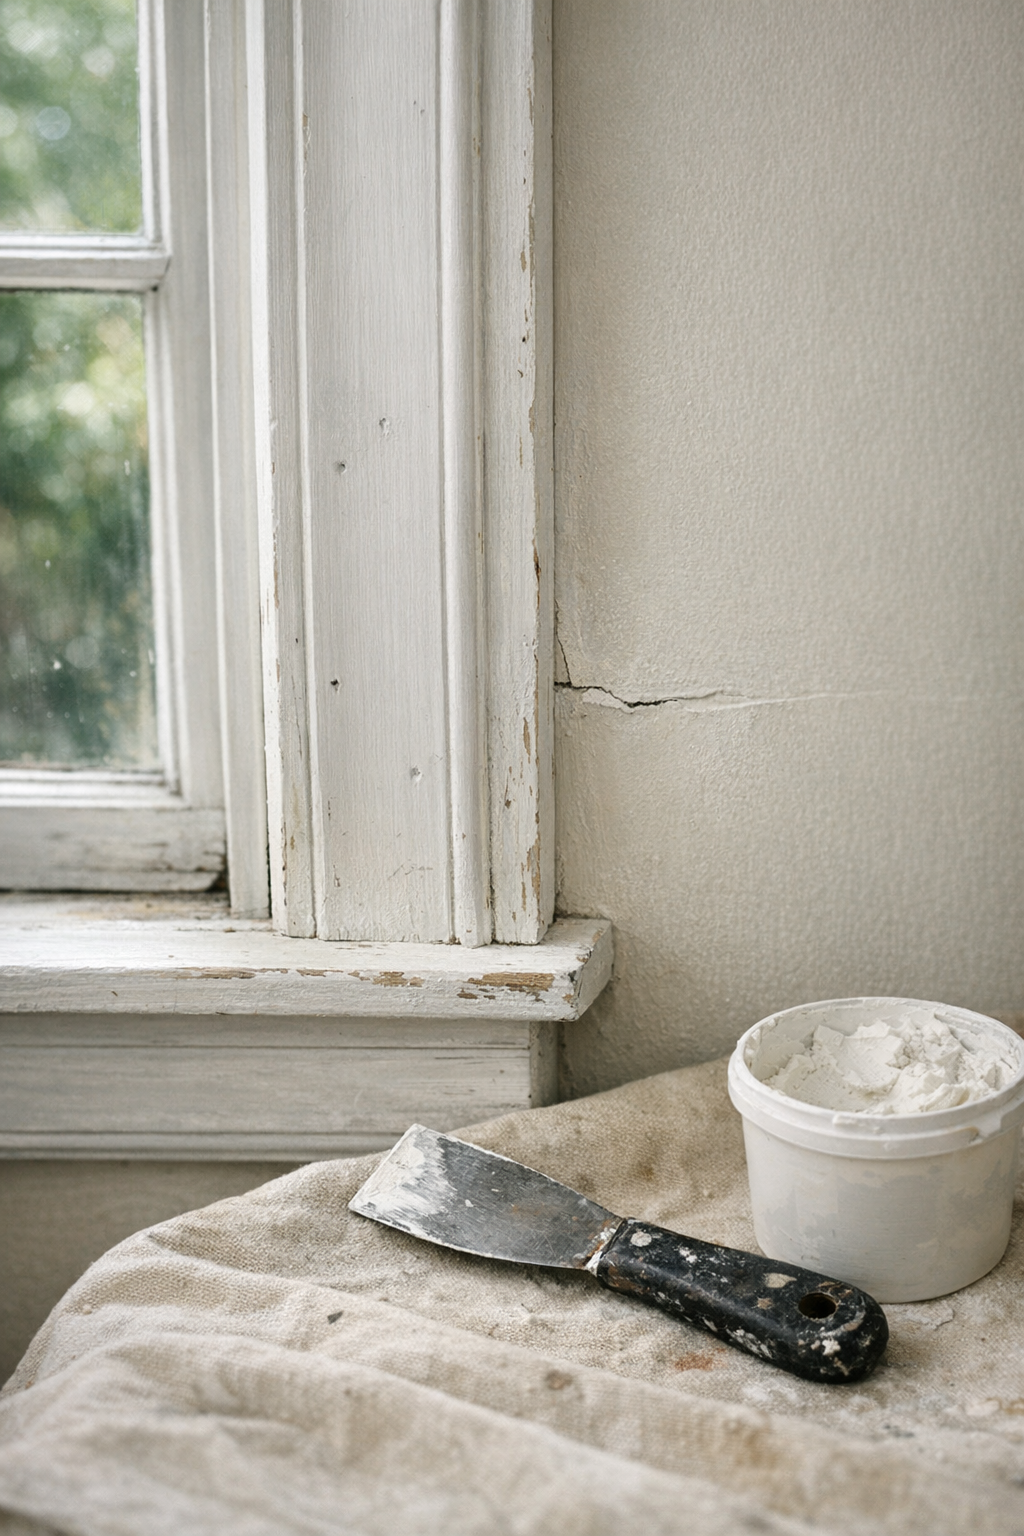
Look closely at the edge of an interior door or window: the casing is the trim frame that covers the small gap where the wall meets the jamb and gives the opening a clean, finished appearance.
This is not general carpentry or a catch-all molding service. The work centers on door trim and window trim specifically, rather than unrelated details such as crown molding, baseboards, shelving, or structural framing. That narrower focus matters because casing has to line up neatly with the jamb, wall surface, and surrounding finishes.
A professional trim project can include installing casing on new openings, replacing outdated profiles, removing damaged pieces, or updating the finish so a room looks more complete after painting, flooring, remodeling, or window and door changes. The goal is a smoother transition around each opening, with clean edges instead of visible gaps, rough drywall lines, or mismatched old trim.
Good installation comes down to finish details: accurate measurements, clean cuts, joints that meet tightly, even spacing around the frame, secure fastening, filled nail holes, and neat caulk lines where the trim meets the wall. Those small details are what make the casing look intentional rather than patched on.
What Our Door and Window Trim Service Includes
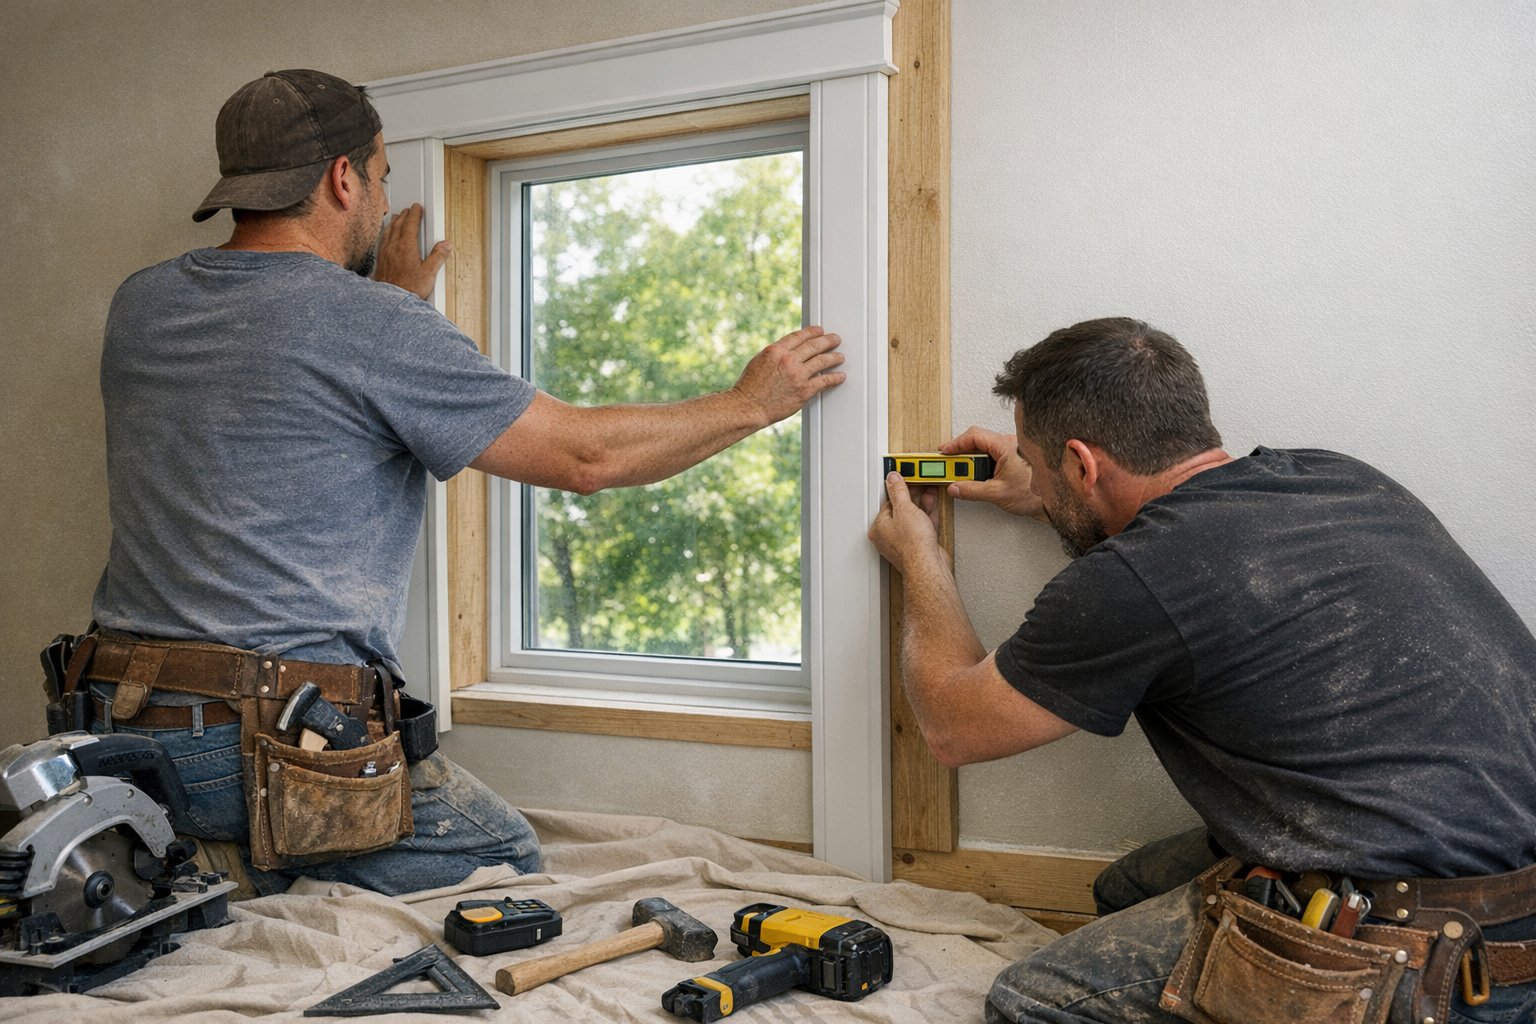
On site, the work starts by looking at each opening as its own fit, not as a one-size-cut-all piece of trim. We measure the door or window, note the wall surface, review the jamb transition where the frame meets the wall, and help choose a profile and material that will match the room or support an intentional update.
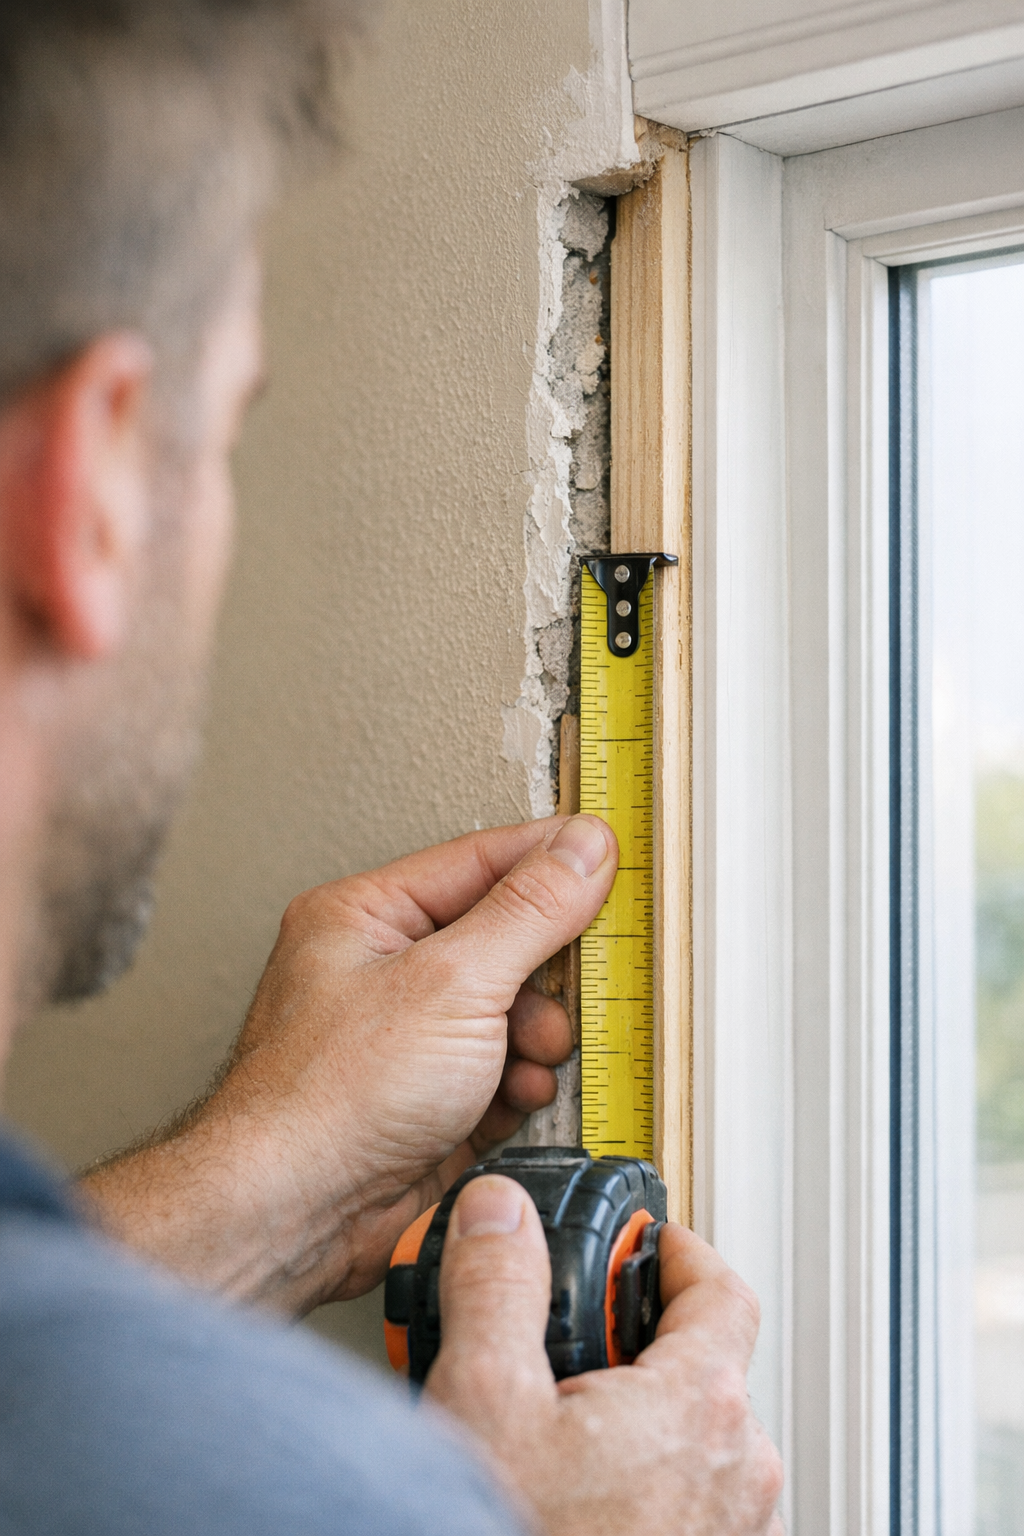
- Layout and reveal planning: the reveal is the small, even setback between the inside edge of the casing and the door or window jamb. A consistent reveal keeps the trim from looking crooked, even when the surrounding wall is not perfectly flat.
- Cutting and fitting: each piece is cut to meet the opening cleanly, with special attention to corners, mitered or square joints, and any uneven drywall edges that could leave shadows or gaps.
- Casing installation: the trim is positioned, aligned, and fastened securely so it sits tight to the wall and frame without loose edges, proud joints, or visible movement.
- Finish preparation: nail holes are filled, joints are cleaned up, surfaces are sanded as needed, and caulk lines are applied where trim meets painted walls so the finished edge looks smooth.
Our door and window trim installation service focuses on the finish carpentry details that affect the final look: tight joints, clean transitions, and trim that is ready for paint or stain. If final painting or staining is part of the project scope, we plan for that finish; if it is handled separately, we prepare the trim so the next step has a clean surface to work from.
That level of interior trim carpentry is especially useful when new trim has to meet existing floors, freshly painted walls, replacement doors, or older windows with slight irregularities. The practical takeaway is simple: the service is not just attaching boards around an opening; it is fitting the casing so the whole area reads as finished, aligned, and intentional.
Why Trim Around Doors and Windows Matters
A room can be freshly painted and still look unfinished if the openings have exposed drywall edges, uneven frame transitions, or shadow lines around the jamb. Trim around doors and windows covers those construction gaps and rough edges so the wall, frame, and opening read as one finished detail instead of separate parts.
Door and window casing also gives vulnerable edges a cleaner, more durable transition. The casing takes the visual focus off minor drywall irregularities, helps protect the edge where the wall meets the frame, and creates a defined border that is easier to finish neatly with caulk, paint, or stain. A strong result looks tight and intentional; a weak one shows gaps, uneven reveals, bulky caulk, or corners that pull attention for the wrong reason.
The style matters because interior door trim and window trim are repeated throughout a home. Matching profiles can make connected rooms feel cohesive, while replacing mismatched or dated casing can make repainting, flooring updates, remodeling work, or new doors and windows look more complete. That is where the service value goes beyond decoration: clean casing helps the whole room feel maintained, finished, and easier to present well.
Door and Window Trim Styles We Can Match or Upgrade
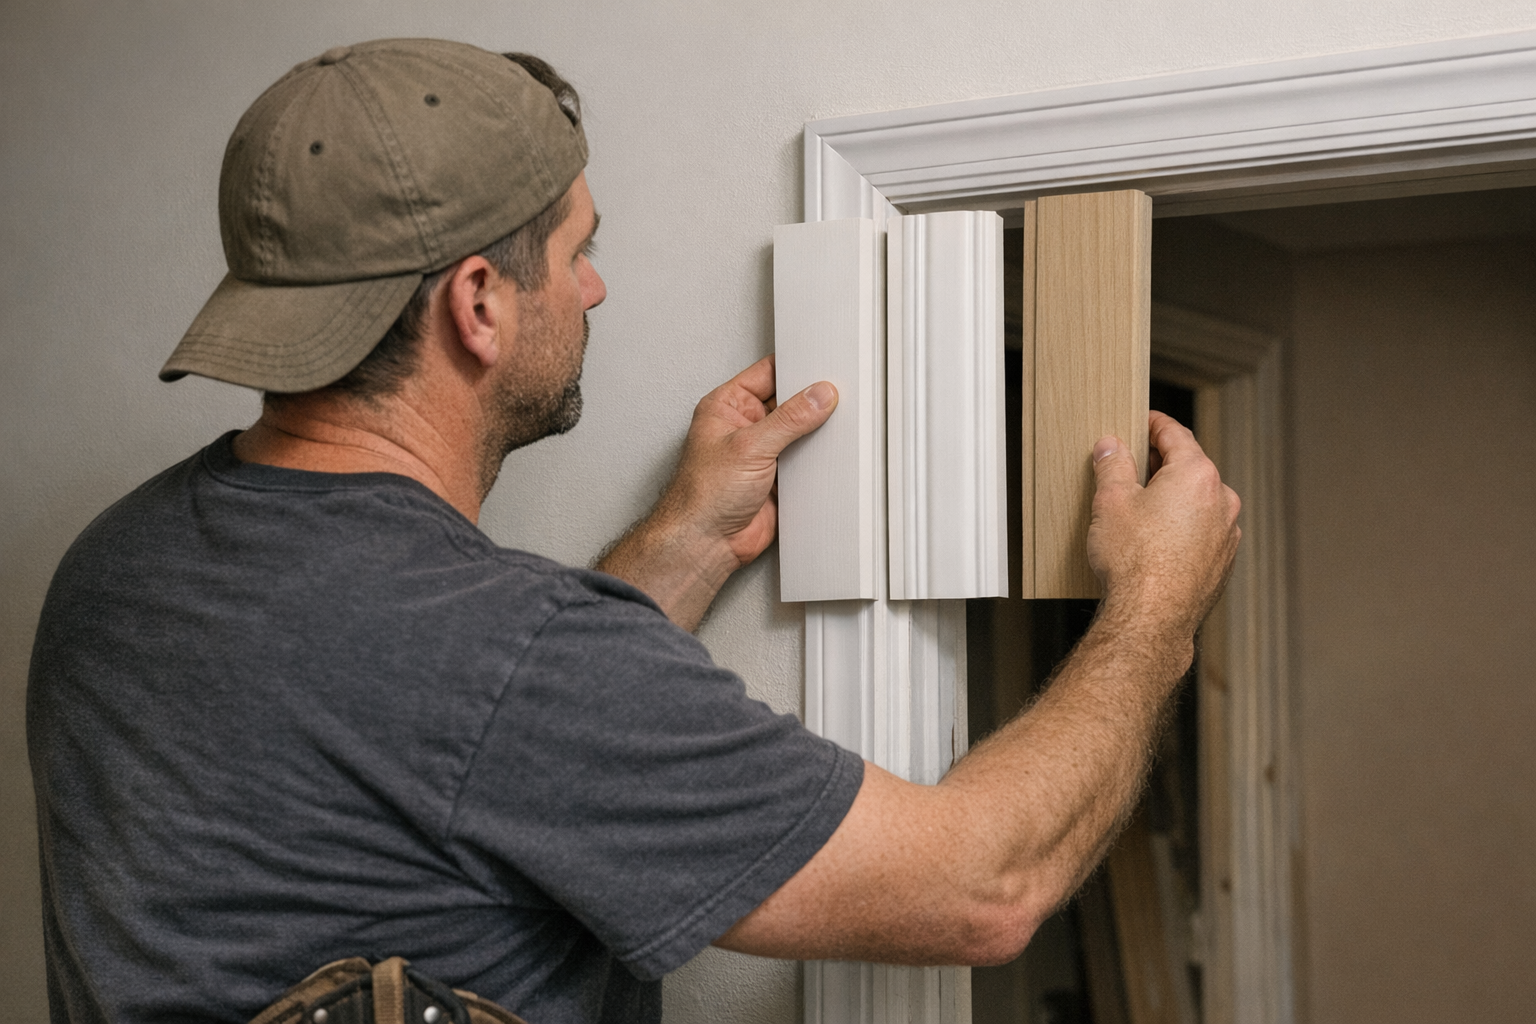
Style selection is where the same opening can feel quiet, detailed, bold, or custom. We can match existing door and window trim when one room needs repair, or upgrade the profile when you want the openings to better fit a remodel, paint plan, or overall room style.
- Modern trim usually means flatter casing with simple square or eased edges. It keeps the wall looking clean and lets paint color, windows, doors, and furniture take more attention. The tradeoff is that flat profiles show crooked reveals or uneven joints quickly, so the layout and cuts need to be especially precise.
- Traditional trim uses shaped profiles, such as curves, steps, or bevels, to add shadow lines and visual detail. It can make a room feel more established, but a profile that is too heavy for the space can crowd small openings or clash with simpler nearby trim.
- Craftsman trim often uses wider, squared boards with a more built-up look. Corners are commonly handled with butt joints instead of mitered corners, which gives the casing a strong, framed appearance and works well with simple baseboards and clean wall colors.
- Custom trim work can combine wider headers, back bands, stools, aprons, or built-up layers when standard casing looks too plain or does not match older details. The goal is not to make every molding in the home identical, but to make the casing coordinate with existing baseboards in thickness, scale, and style direction so the room feels intentional.
Material and Finish Options for Door and Window Casing
Material choice affects more than the final color. It changes how the casing cuts, how crisp the edges look, how well the surface accepts paint or stain, and how the trim holds up near windows, bathrooms, laundry areas, or other damp spots.
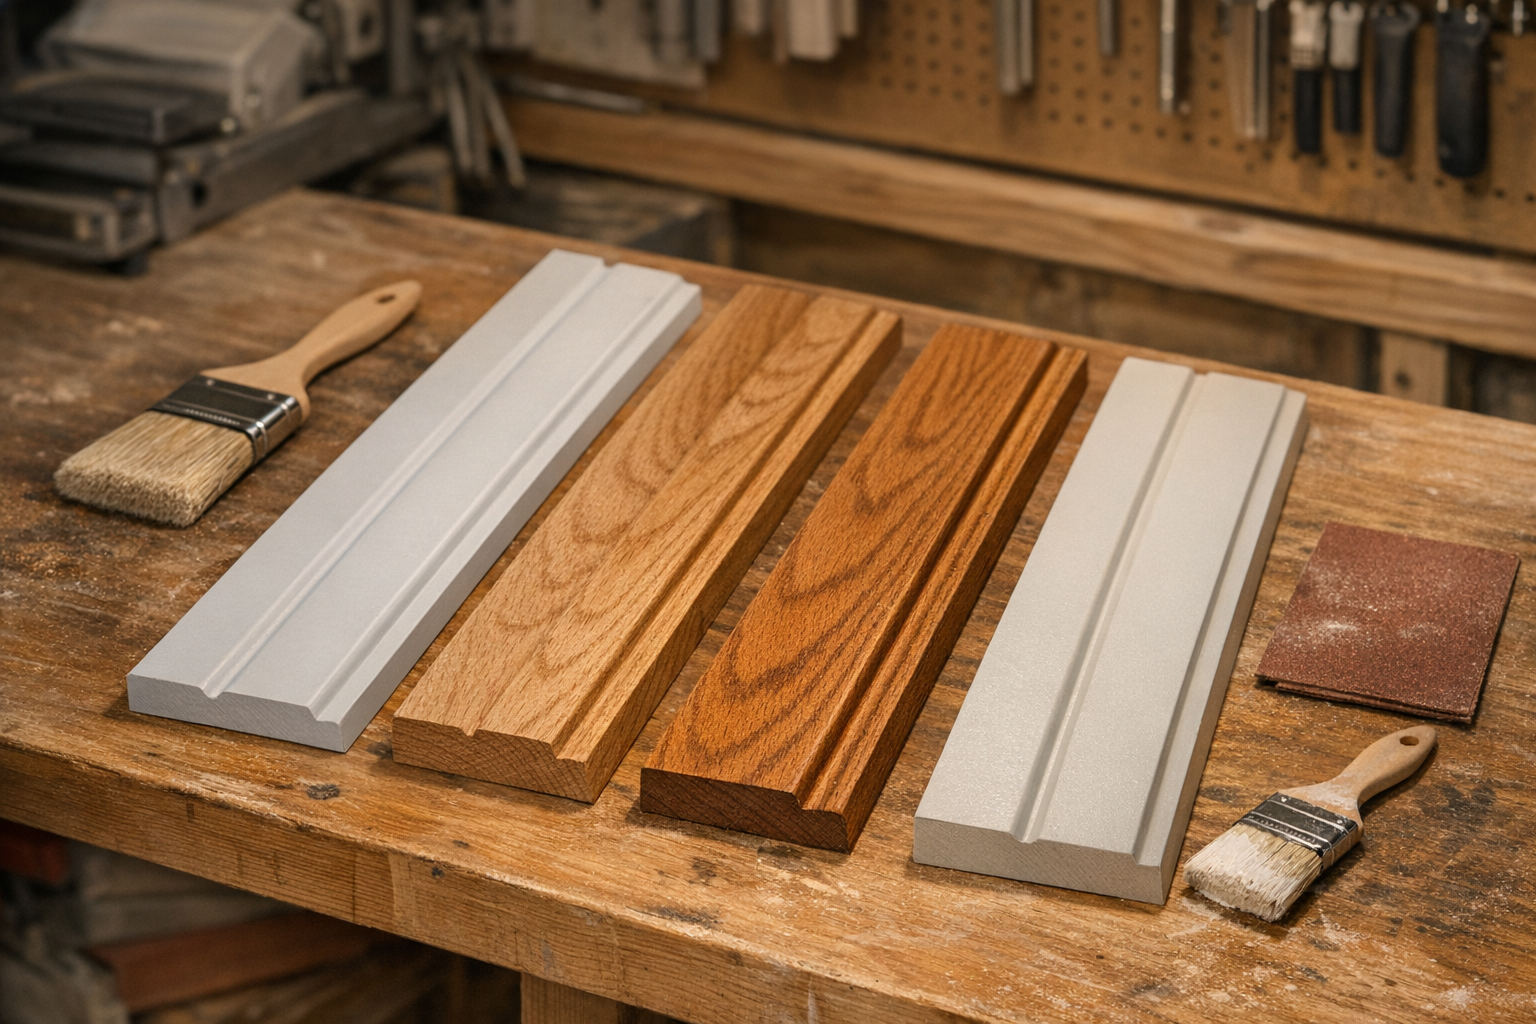
- MDF is a smooth, engineered paint-grade option that works well for many interior rooms because it has a consistent surface and no visible grain. It is often chosen for clean painted trim, especially when the goal is a smooth, uniform finish. The tradeoff is moisture sensitivity, so it is not usually the first choice where window condensation, leaks, or damp conditions are a concern.
- Pine is a common wood trim choice for painted or budget-conscious projects. It is light, workable, and widely used for casing, but knots and grain can telegraph through lighter finishes if the prep is weak. Good priming, filling, sanding, and caulking matter when pine is being painted.
- Poplar is another practical paint-grade wood option. It tends to offer a smoother, more consistent surface than many knotty softwoods, which makes it useful when the trim will be painted but the homeowner still wants real wood rather than MDF.
- Oak and other hardwoods are typically selected for stain-grade work, where the grain is meant to remain visible. Stained trim can add warmth and detail, but it also makes sanding, joint fit, color matching, and clean handling more important because caulk and filler cannot hide flaws the same way paint can.
- PVC trim is a moisture-resistant option for select applications, especially where damp exposure is part of the decision. It can be helpful near vulnerable windows or utility areas, though it has a different feel and finishing approach than wood or MDF.
The practical takeaway is to choose the material around the room, the finish, and the exposure. Paint-grade casing lets the finish create the look, while stain-grade casing depends on the natural character of the board. For door and window trim that needs to look sharp and last, the right material is paired with clean cuts, tight joints, secure fastening, and finish prep that suits the chosen surface.
When Door and Window Trim Should Be Repaired or Replaced
A good time to look closely at the casing is when the damage stops blending into the background. Small nail holes, a minor gap at the wall, an isolated caulk crack, or light cosmetic scuffing may only need trim repair: filling, sanding, re-caulking, and touch-up finish work can often restore the piece without changing the whole opening.
Replacement becomes the better choice when the trim itself is no longer sound or no longer fits the room. Swollen MDF, rotted wood, warped pieces, split corners, repeated miter failure, or casing that pulls away after being fastened usually points beyond a surface fix. In those cases, door and window trim replacement gives the opening a cleaner reset instead of layering more caulk or filler over a problem that will keep showing.
Poor previous installation can also justify trim replacement. Uneven reveals, bulky caulk lines, open joints, proud or sunken boards, and mismatched profiles make the opening look patched together even if the material is not badly damaged. The practical distinction is simple: repair works when the existing piece is straight, secure, and worth keeping; replacement works better when the fit, profile, or material is the issue.
Trim may also need attention after window or door replacement, wall repairs, flooring changes, or a room remodel. New frames can expose old cut lines, leave gaps, or make the previous casing look undersized or mismatched. If there are signs of moisture staining, swelling, or repeated cracking, the opening should be assessed before new trim is installed so the finished work is not covering an active problem.
What Quality Trim Installation Looks Like
The finished opening should look calm, square, and intentional from a normal standing distance. A key checkpoint is the reveal: the small, consistent margin left between the inside edge of the casing and the door or window frame. When that spacing stays even on the top and sides, the frame looks balanced; when it wanders, the eye catches it right away.
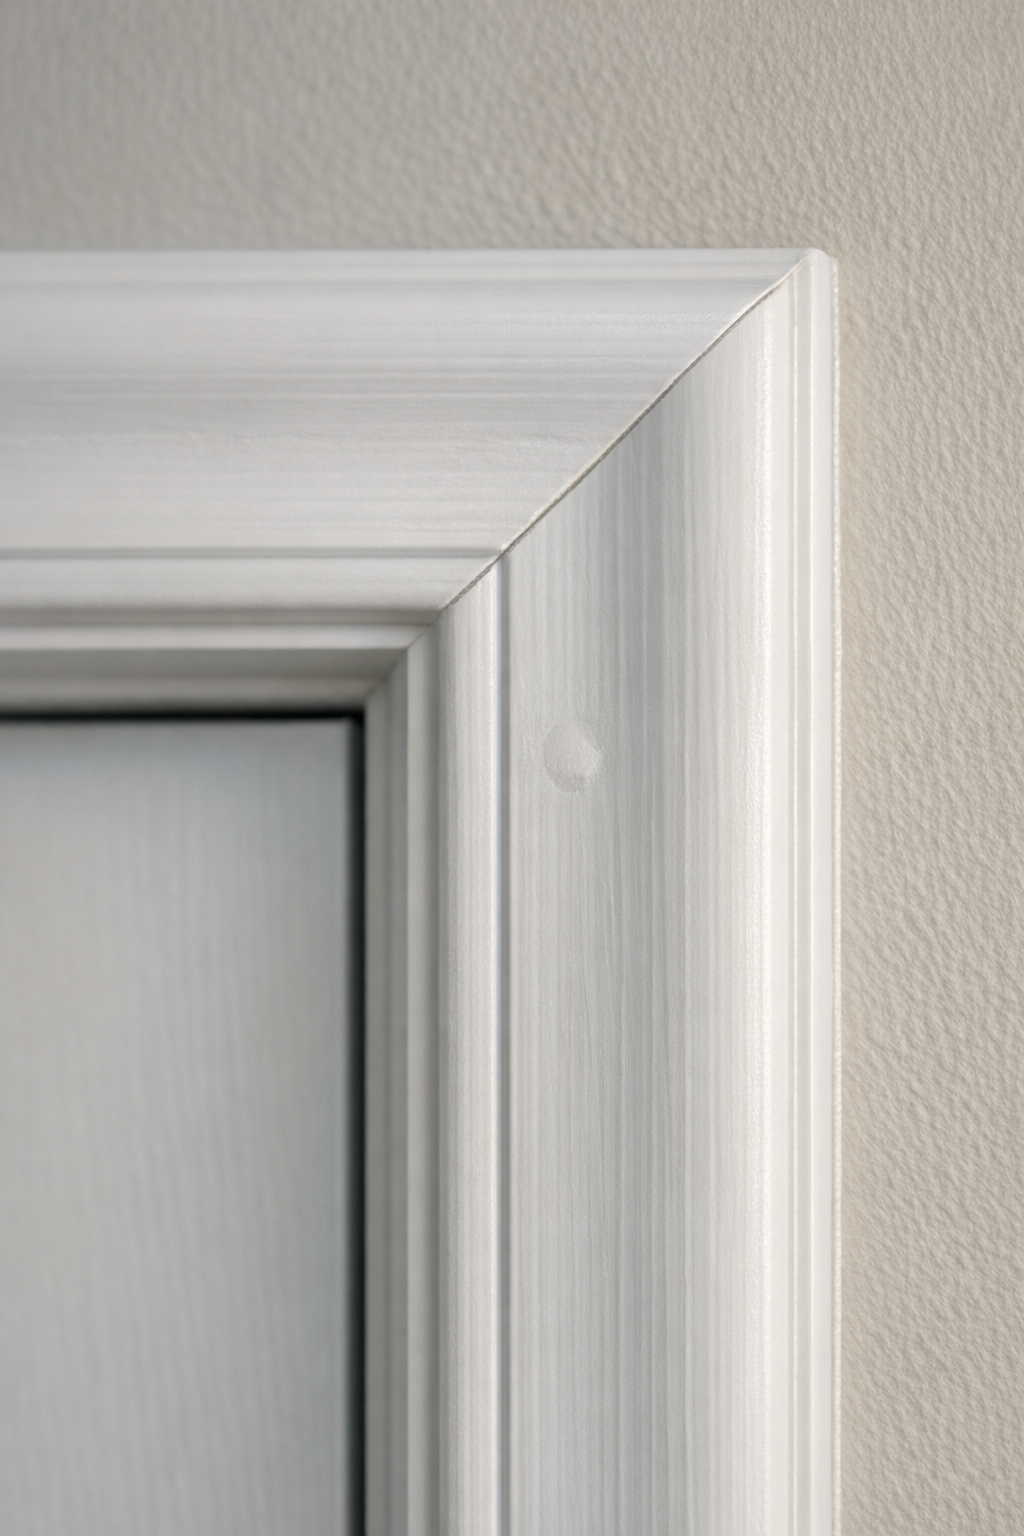
Clean trim installation also shows up in the corners and transitions. Mitered or butted joints should meet tightly without dark cracks, crushed edges, or heavy filler. Returns should end cleanly, profiles should line up from piece to piece, and the trim should sit flush against the wall and jamb instead of rocking, twisting, or leaving shadow gaps.
The finish details matter just as much. Nail holes should be filled smooth, fasteners should not stand proud, caulk lines should be narrow and uniform, and the surface should be ready for paint or stain without obvious sanding marks, split trim, smeared caulk, or mismatched profile alignment. Those are the differences between door and window trim that looks built into the room and trim that looks added after the fact.
A qualified interior trim carpentry provider brings value by controlling those small tolerances across every opening, especially in older rooms where walls and frames are not perfectly straight. Careful measuring, clean cutting, proper fastening, and finish-ready prep reduce the need for bulky caulk or repeated touch-ups later.
What to Expect During Your Trim Project
Before anything is cut, we walk through each opening with you and note what is staying, what is being replaced, and what needs special attention. That assessment includes measuring each door and window, checking the existing casing and wall condition, looking for uneven transitions, and discussing whether the goal is a close match, a cleaner update, or full trim replacement.
Material and profile choices are part of that early conversation. Material affects durability and finish, while the profile affects the visual detail and how much fitting is required; a simple flat casing is more straightforward, while a built-up or decorative profile has more pieces, transitions, and alignment points. Finish matters too: painted trim is typically selected for a smooth, uniform color, while stain-grade trim puts more emphasis on wood grain and consistent boards.
Once the plan is set, scheduling depends on the number of doors and windows, whether custom material must be ordered, whether old trim needs careful removal, and whether wall repairs, sanding, priming, painting, or staining are included. Cost is shaped by the same scope factors: opening count, material, profile complexity, demolition, wall condition, repairs, and finish requirements, so the best estimate is based on the actual home rather than a generic square-foot number.
During the work, surrounding surfaces are protected, old casing is removed when needed, new pieces are cut and fastened, and the trim is prepared for its final finish. Before the project starts, homeowners can help by clearing window areas, moving small furniture near the openings, and confirming finish preferences so the installation can move cleanly from fitting to final prep.
Choose a Qualified Team for Door and Window Trim Work
The right crew shows up in the small decisions: measuring each opening before cutting, holding even reveals, fitting corners tightly, and choosing fasteners, filler, caulk, sanding, primer, paint, or stain prep around the finish you want. Our finish carpentry experience helps us spot when trim repair is enough, when replacement will look cleaner, and when custom trim work is the better way to match an older profile or complete a remodel.
We also guide material choices so the casing fits the room, not just the opening. Paint-grade and stain-grade trim have different finish expectations, and damp or high-use areas may call for a more durable option. Throughout the project, we work carefully around existing doors, windows, walls, and flooring, keep the jobsite clean, and leave the trim ready for a smooth final finish. To get started, request an estimate or schedule service to discuss your openings, materials, style, and finish goals.
FAQs
What does door and window trim installation include?
Door and window trim installation includes measuring each opening, planning the reveal, cutting and fitting casing, fastening the trim, filling nail holes, sanding, and applying neat caulk lines. The reveal is the small, even setback between the inside edge of the casing and the door or window jamb.
When should door and window trim be replaced instead of repaired?
Door and window trim should be replaced when the casing is swollen, rotted, warped, split, pulling away, or repeatedly failing at the joints. Repair is better for minor nail holes, small wall gaps, isolated caulk cracks, light scuffs, or trim that is still straight, secure, and worth keeping.
What is the best material for door and window trim?
The best material depends on the room, finish, and exposure. MDF is smooth for painted interior trim but sensitive to moisture, pine and poplar are practical paint grade woods, oak and other hardwoods work well for stain grade trim, and PVC is useful where moisture resistance is needed.
Should door and window trim match baseboards?
Door and window trim does not need to be identical to baseboards, but it should coordinate in thickness, scale, and style direction. Matching or compatible profiles make connected rooms feel cohesive, while mismatched or dated casing can make a remodel, repaint, or flooring update look unfinished.