Shiplap can make a plain wall or ceiling feel intentional, but the finished look depends on more than fastening boards in a row. Professional shiplap installation starts with careful layout, stud location, a level starter line, and finish-carpentry decisions that affect how straight the lines look, how the edges meet trim, and how clean the room feels when the work is complete.
Our service is built around the details homeowners notice every day: the right location for the feature, the best material for the room, the board direction and spacing, the way corners and outlets are handled, and whether the final surface should be painted, stained, or coordinated with existing trim. A good shiplap accent wall should look planned into the room, not added as an afterthought.
Whether you are considering an accent wall, ceiling treatment, fireplace feature, bathroom wall, entry, bedroom, laundry room, or another interior project, you can request an estimate and talk through the look you want. We will help you think through the design, the practical room conditions, and the finish details before the project begins.
What Our Shiplap Installation Service Includes
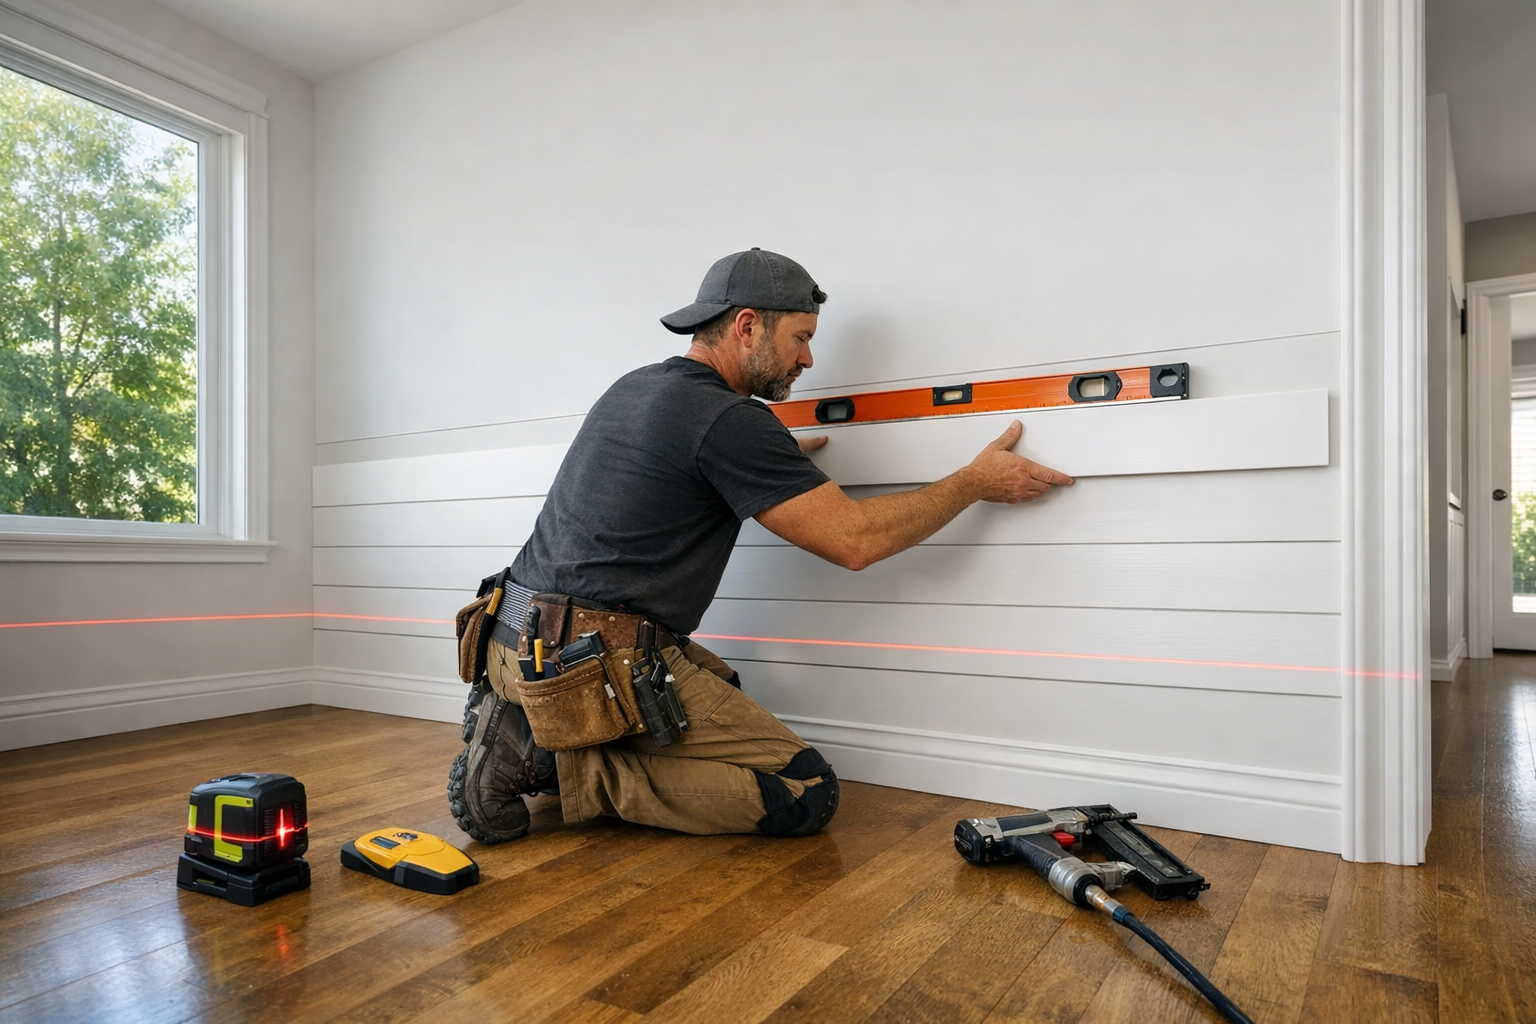
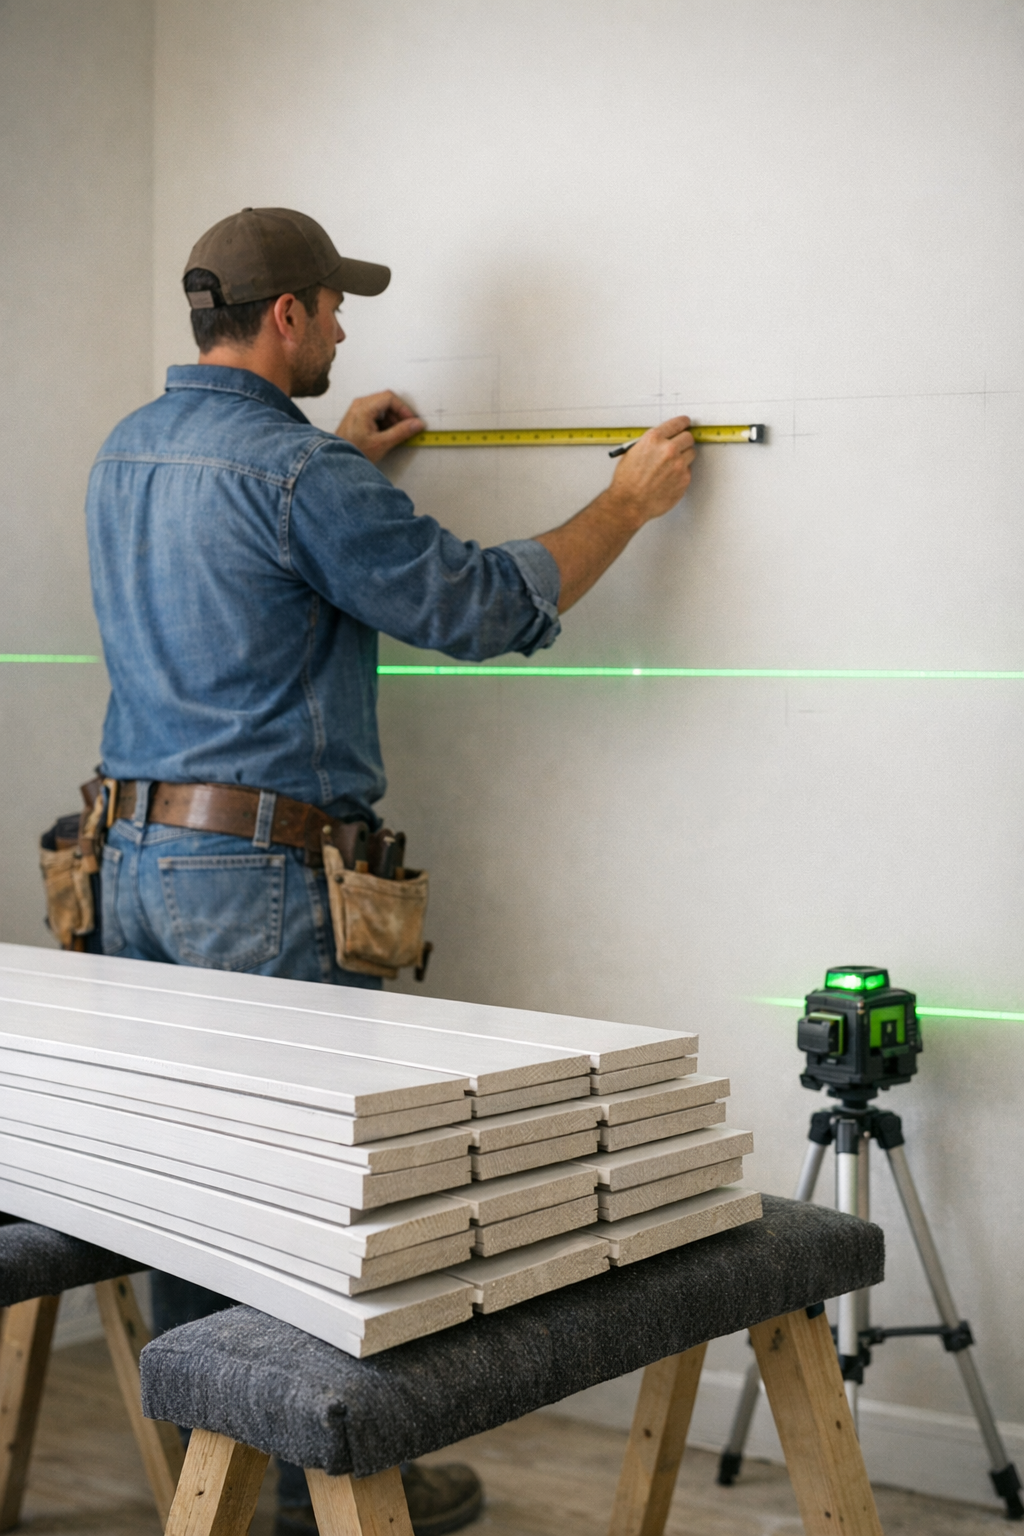
The first part of the service is planning the finished surface before any boards are cut. We measure the wall or ceiling, look at the surface condition, discuss the material and finish you want, locate studs, and establish level layout lines so the rows have a clean starting point instead of drifting as the project moves across the room.
From there, the work is handled like finish carpentry, not just wall covering. Boards are cut to fit the space, fastened securely, and planned so seams, corners, edges, and trim transitions look intentional. For a shiplap wall installation, that may include fitting boards around outlets, switches, windows, door openings, built-ins, or existing baseboards so the feature looks integrated with the room.
The finishing stage is where a lot of the visible quality shows. Depending on the design, we handle appropriate caulking at select transitions, fill nail holes, sand rough spots, prime bare or patched areas, and paint or coordinate the finish so the surface feels smooth and complete. The goal is straight lines, tight transitions, and a surface that looks ready to live with every day.
We also keep the project organized around your home. That includes protecting the work area as needed, managing cuts and materials, and cleaning up after installation so you are left with the finished feature rather than a mess from the process. When you hire us to install shiplap, the service covers the planning, carpentry, finishing, and cleanup that make the final result feel polished.
Where Shiplap Works Best in the Home
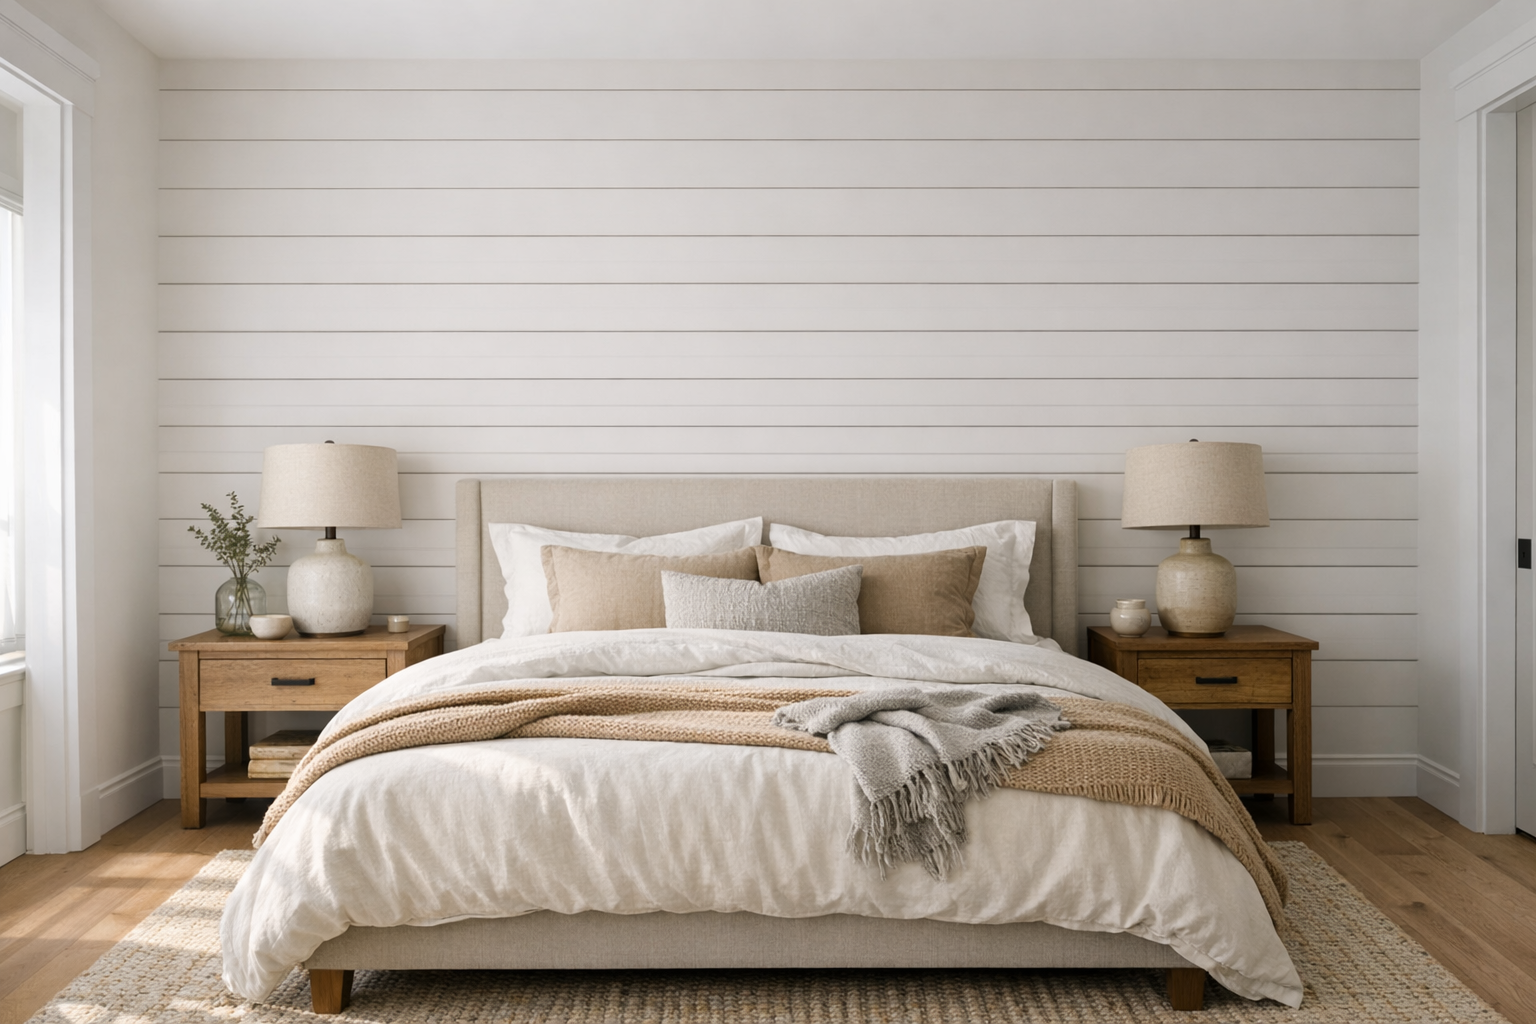
The best locations are the ones where the boards can add character without fighting the room. Accent walls work well when you want one focal surface behind a bed, sofa, dining table, or entry bench. Shiplap walls add texture, rhythm, and architectural detail, so a flat room can feel more layered without adding heavy ornament.
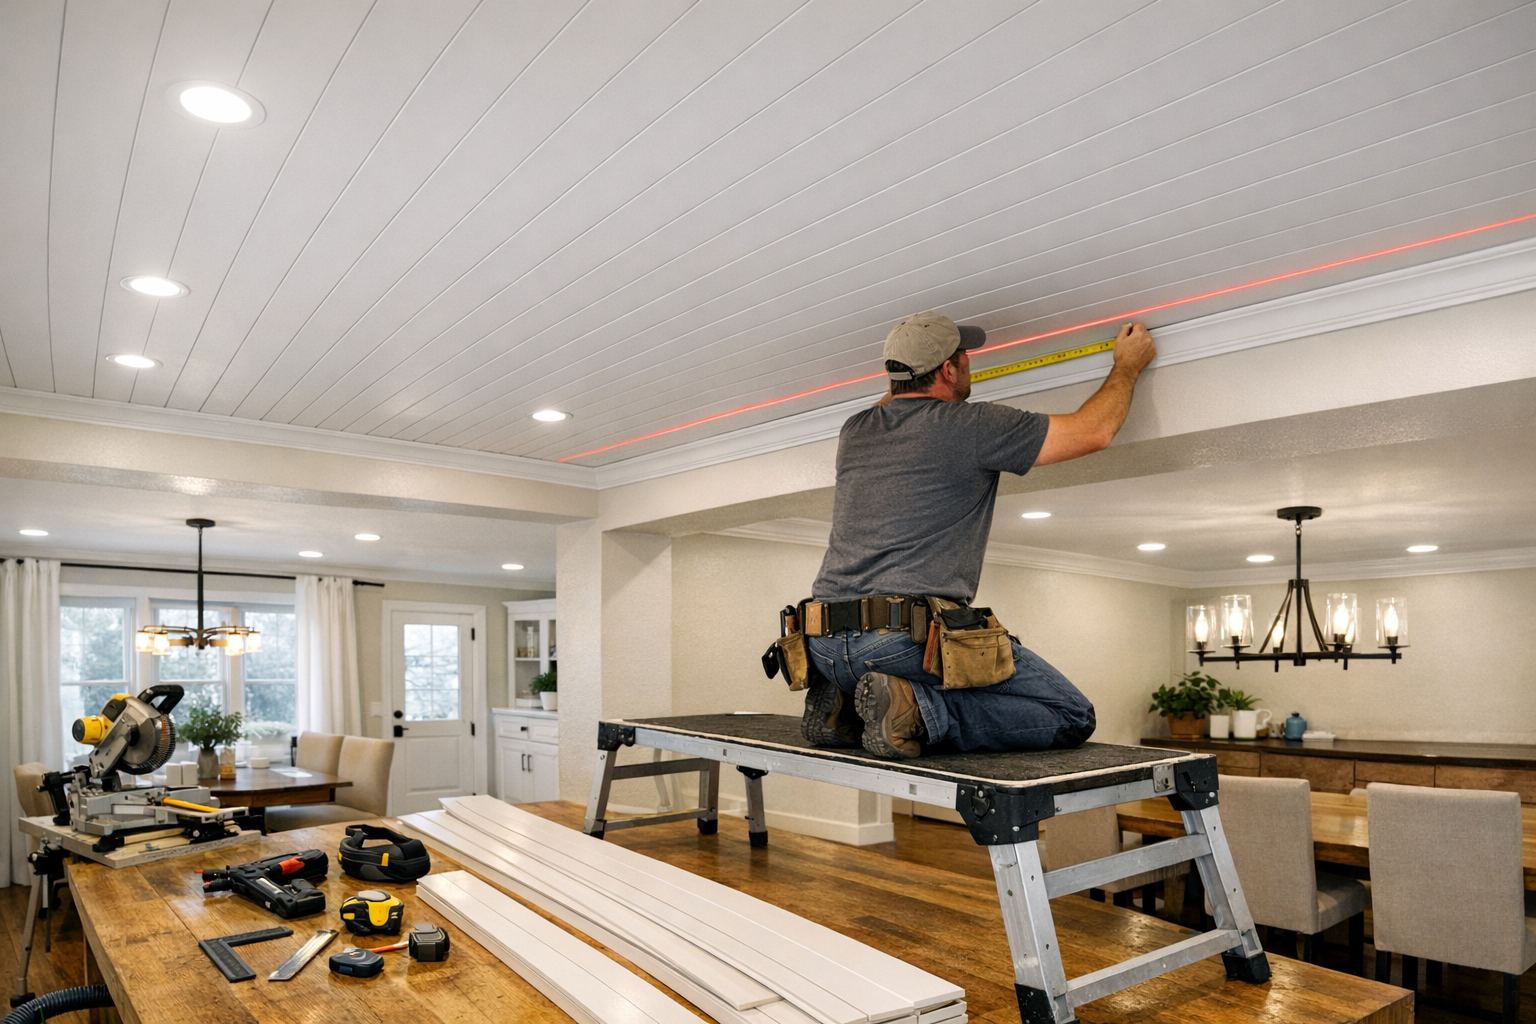
Ceilings are another strong option when the surface can be laid out cleanly and tied into the surrounding trim. A shiplap ceiling can make a bedroom, dining room, hallway, or covered interior-style area feel more finished, but shiplap ceiling installation takes careful planning because long runs make crooked lines and uneven transitions more noticeable.
Fireplace features can be beautiful, especially when the goal is a taller, more built-in focal point, but they need a more cautious review. Heat exposure, the existing surround, clearances, and the materials already in place all affect whether shiplap is the right choice for that wall or whether another finish would be smarter.
Mudrooms, laundry rooms, and select bathroom areas can also be good candidates when the material, finish, ventilation, and splash exposure are considered up front. In these spaces, the practical question is not just whether the look fits; it is whether moisture, wall condition, and daily use support a durable result. That is where a professional shiplap installation helps match the design idea to the room instead of forcing the same treatment everywhere.
Choosing the Right Shiplap Material, Gap, and Finish
Material choice is where the design starts to become practical. MDF shiplap is a smooth, paint-friendly option for dry interior rooms where the goal is a crisp, built-in look. Wood shiplap is better when you want visible grain, a stain-grade finish, or a warmer natural style, though it can show more variation from board to board. PVC shiplap is often considered for damp or utility areas because it is not trying to mimic the behavior of interior wood trim in the same way.
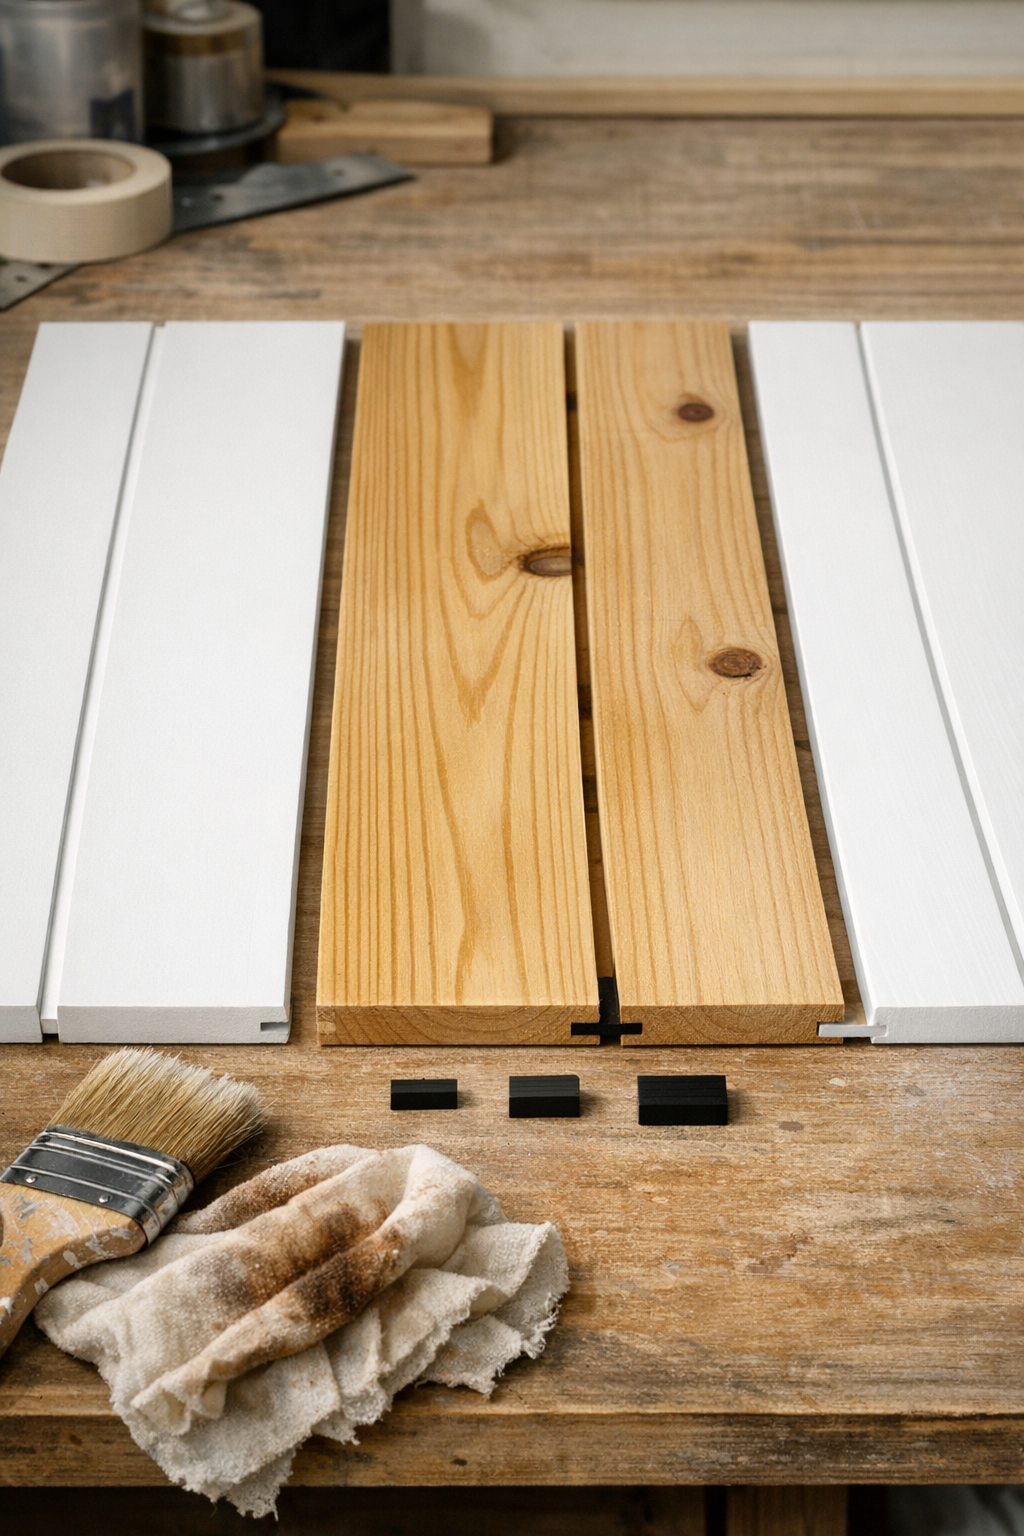
Tongue and groove boards are another option when you want the boards to lock together more tightly and create a more traditional plank surface. They can look very clean, but the profile, thickness, and edge detail affect how the finished wall meets baseboards, casing, corners, and outlets. For any shiplap installation, the best material is the one that fits both the room conditions and the finish you expect to see every day.
The gap style also changes the final look. A nickel gap creates a narrow, consistent shadow line between boards, giving the wall a tailored pattern without making the seams feel heavy. Wider or more rustic spacing reads more casual. The important part is consistency: the layout should be measured before fastening so the rows stay straight and the spacing does not drift across the wall or ceiling.
Finish decisions matter just as much as the board itself. Painted shiplap usually looks best with smooth boards, filled nail holes, and clean caulk lines where the boards meet trim. Stain-grade or natural wood looks depend more on grain, board selection, and careful cuts because the surface is not hidden under opaque paint. Textured boards can add character, while smooth boards create a cleaner, more modern result.
The Details That Make Shiplap Look Custom Instead of Afterthought
A proud baseboard, a bowed drywall seam, or a casing reveal that changes from top to bottom can make the whole feature feel off. Before fastening, we look at wall flatness and substrate condition because bows, bumps, loose drywall, or uneven backing can make straight boards look wavy. A measured layout helps keep the rows from drifting as they move across the surface.

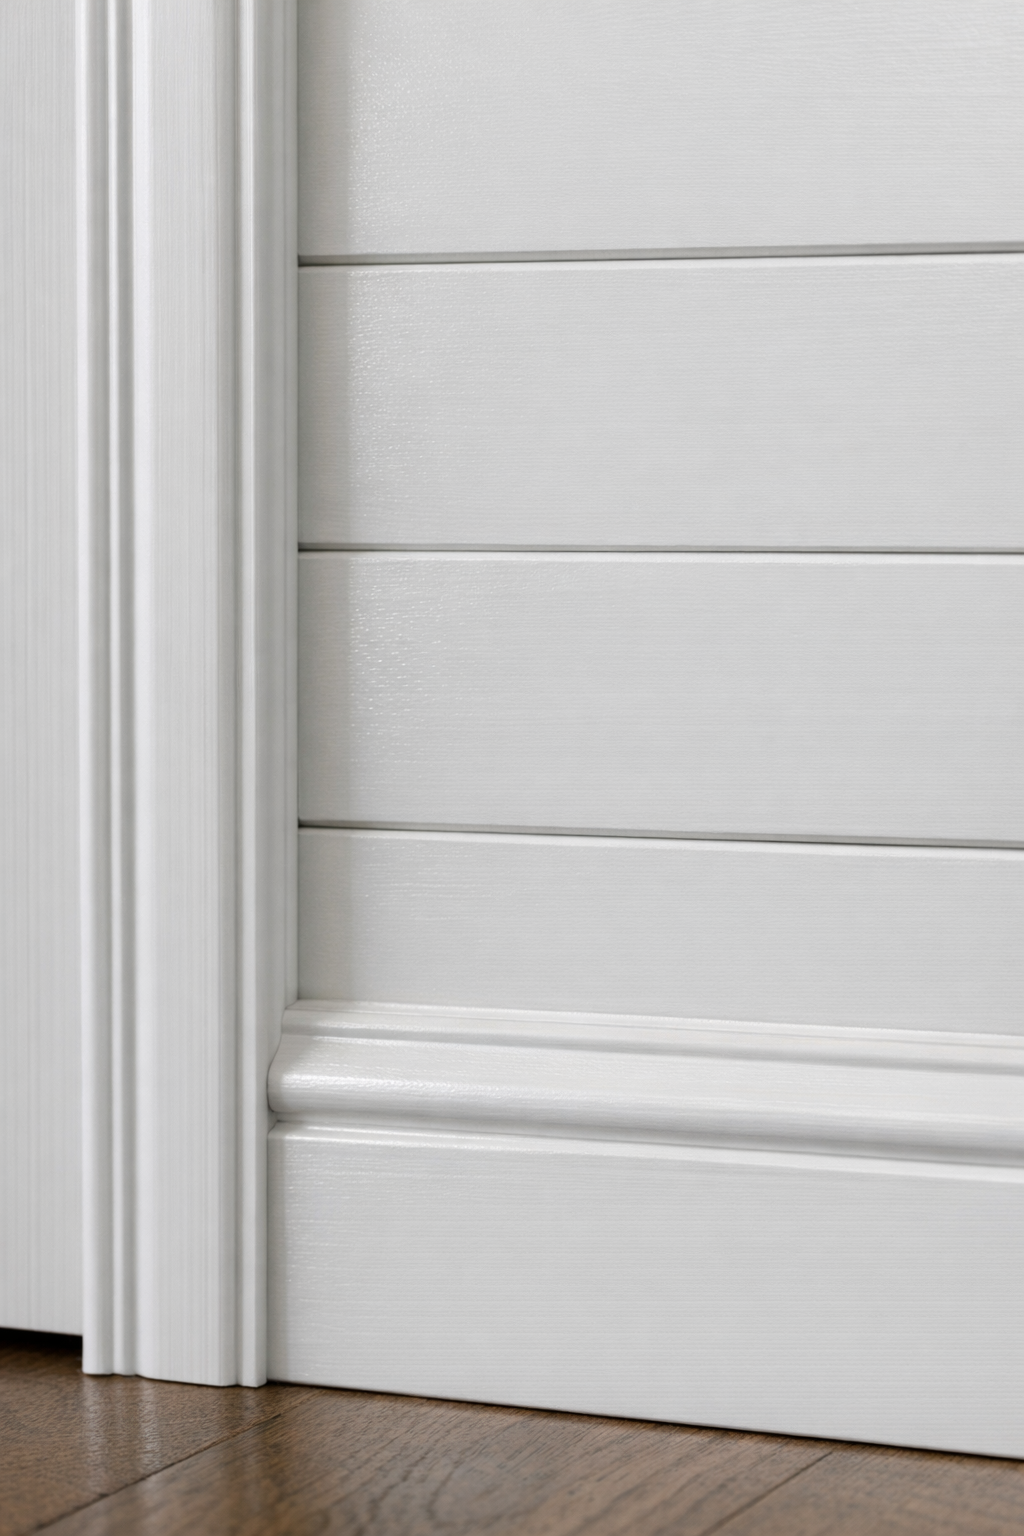
Baseboards, crown molding, door casing, window casing, and ceiling lines all act as visual borders. Good trim installation gives the boards a clean place to start and stop; weak planning leaves skinny slivers, uneven reveals, or boards that appear to crash into the trim. Inside corners need tight, deliberate returns, while outside corners need a clean edge treatment so the boards do not look exposed or unfinished.
Outlets and switches need the same planning. The board layout should consider where device boxes fall so cuts are neat, covers sit cleanly, and the horizontal lines do not look chopped up around the wall. Seam placement matters, too: a polished custom shiplap installation avoids obvious stacked joints and places transitions where they feel intentional instead of convenient.
This is where shiplap becomes finish carpentry. Consistent board spacing, straight sightlines, tight trim transitions, filled nail holes, and appropriate caulk lines are the details that make the feature feel built in. The takeaway is simple: preparation and layout decisions prevent the problems homeowners notice later, including uneven gaps, awkward end pieces, exposed seams, and messy intersections with adjacent walls, ceilings, tile, cabinetry, or existing trim.
Why Hire a Professional for Shiplap Work
The first place a pro earns their keep is the cut plan: where full boards land, where seams are least noticeable, and how the final row will meet the ceiling or trim. Professional shiplap work gives you careful measuring, a square reference point, and fastening that is planned around the surface instead of improvised as the rows go up. That matters because a small error at the beginning can turn into crooked sightlines, uneven spacing, or seams that become more obvious across a full wall or ceiling.
A small DIY accent in a low-visibility spot may be manageable for a careful homeowner. Larger walls, ceilings, fireplace features, bathrooms, laundry areas, and main living spaces are less forgiving because the boards interact with more corners, trim, openings, and finish conditions. A home remodeling contractor looks at those pressure points together, then plans the wall panel installation so the finished feature feels intentional rather than patched in.
A professional also helps coordinate the choices that affect the final surface: board type, cut quality, fastening pattern, nail-hole filling, caulk lines where appropriate, and whether the finish should be painted smooth or handled as stain-grade wood. The practical takeaway is simple: you are paying for cleaner lines, tighter transitions, a smoother finish, and less disruption during the project.
Request a Shiplap Installation Estimate
To request a shiplap installation estimate, send the room type, rough wall or ceiling dimensions, a few clear photos, and the look you have in mind. If you are comparing interior wall paneling styles, include any inspiration photos, preferred board direction, material preference, and paint or stain color.
It also helps to mention moisture concerns, fireplace locations, existing trim you want to keep, outlets or switches in the work area, and any wall damage we should review. From there, we can talk through the design, prepare an estimate, schedule the work, complete the installation and finishing, clean up the area, and walk through the finished custom shiplap installation with you.
Ready to get started? Contact us with your project details and photos, and we'll help you plan a clean, finished shiplap feature that fits your home.
FAQs
What does professional shiplap installation include?
Professional shiplap installation includes measuring the wall or ceiling, locating studs, checking surface condition, setting level layout lines, cutting and fastening boards, and planning seams, corners, outlets, switches, and trim transitions. Finishing can include caulking select transitions, filling nail holes, sanding rough spots, priming bare or patched areas, painting or coordinating the finish, and cleaning up the work area.
Can shiplap be installed over drywall?
Yes, shiplap can be installed over drywall when the surface is stable, flat enough, and properly planned. Bowed seams, bumps, loose drywall, or uneven backing should be reviewed first because they can make straight boards look wavy after installation.
Can shiplap be installed on ceilings?
Yes, shiplap can be installed on ceilings in spaces such as bedrooms, dining rooms, hallways, and covered interior-style areas. Ceiling installation needs careful layout because long runs make crooked lines and uneven trim transitions more noticeable.
What is a nickel gap in shiplap installation?
A nickel gap is a narrow, consistent shadow line between shiplap boards. It creates a tailored pattern without making the seams look heavy, and the spacing must be measured before fastening so rows do not drift across the wall or ceiling.
What is the best material for shiplap walls?
MDF shiplap is best for dry interior rooms when you want a smooth, paint-friendly, built-in look. Wood shiplap works well for visible grain, stain-grade finishes, or a warmer natural style, while PVC shiplap is often considered for damp or utility areas.