
Trim looks like one of the last "small" items in a remodel, but it sits at the meeting point of several trades. Baseboards cover the wall-to-floor joint, door and window casing frame openings, crown molding finishes the wall-to-ceiling line, and shoe molding or quarter round closes small gaps where flooring meets baseboards. Because each piece touches something another trade has built, repaired, installed, or painted, trim work during remodel planning needs to happen before the final week.
Delays usually start with simple mismatches. A missing baseboard profile can hold up finish carpentry. A flooring height change can leave an awkward gap under existing trim. Cabinet fillers or end panels can change where casing, base, or scribe pieces need to stop. Paint that is completed too early may need extra touch-ups after trim is nailed, caulked, or adjusted.
The goal is not to force every project into one rigid order. A kitchen remodel with new cabinets and tile may need a different trim sequence than a bedroom update with carpet and reused casing. A good plan identifies what must be selected early, what should be measured after conditions are reliable, and where caulking, paint, and punch-list touch-ups need their own time on the schedule.
Step 1: Decide Early What Trim Is Staying, Changing, or Being Replaced
Start the trim conversation before anyone starts prying pieces off the wall. The first decision is whether each area is a reuse, match, modify, or replace situation. Reuse means the existing trim is removed carefully, labeled, stored, and reinstalled. Match means some existing trim stays, but new pieces must be ordered or milled to blend in. Modify means the profile may stay, but lengths, returns, or transitions change because of new cabinets, floors, doors, or openings. Replace means the old profile is no longer driving the plan, so demolition and ordering can move faster.
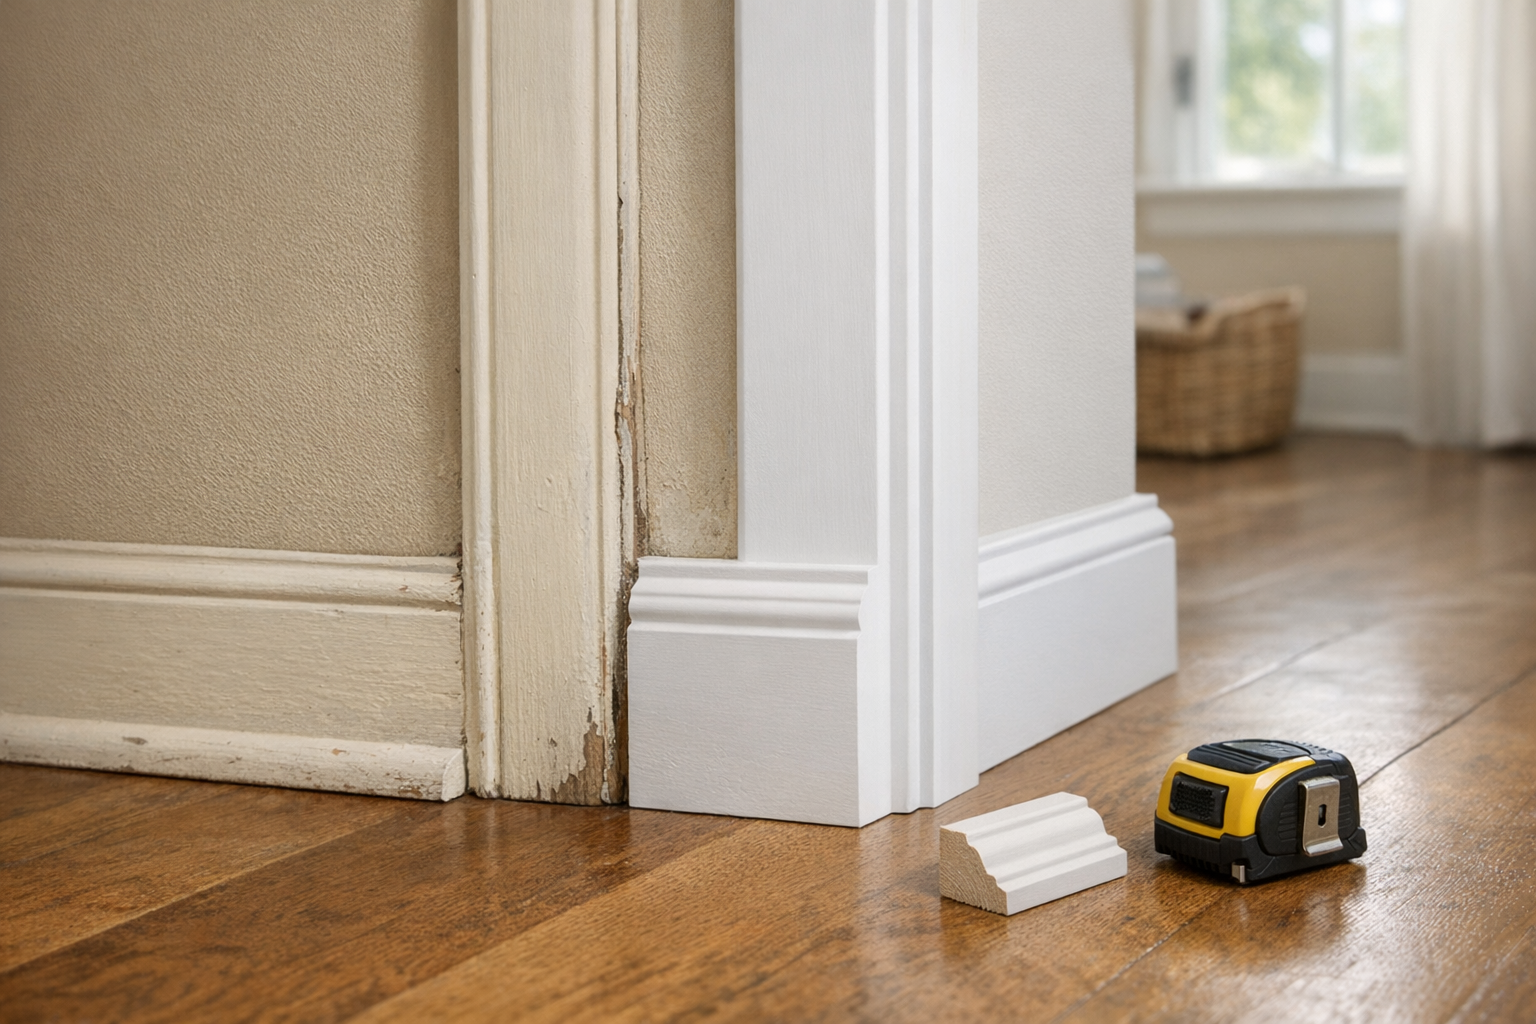
Walk the house by trim type: baseboards, door casing, window casing, crown molding, and shoe molding. This is not a style exercise yet; it is a scheduling checkpoint. If existing pieces are brittle, heavily built up with paint, water damaged, split at miters, or inconsistent from room to room, saving them may create more labor than replacing them. If they are clean, straight, and important to matching nearby rooms, the demolition crew needs to know that before removal begins.
This early call changes several parts of the remodel. Salvaged trim requires slower demolition and a place to store labeled pieces. Replacement trim may require earlier material ordering, especially if an older profile has to be matched. Removing trim can also expose paint lines, torn drywall paper, gaps, or previous repairs, which affects how much wall prep is needed before paint.
A good planning signal is a room-by-room note such as "reuse crown in dining room, replace baseboards in kitchen, match hall casing at new pantry opening." A weak signal is "we'll decide later," because interior trim during remodeling touches demolition, drywall repair, ordering, and finish carpentry. Making this choice early keeps trim work during remodel planning from becoming a last-minute search for missing profiles or damaged pieces.
Step 2: Choose Profiles, Materials, and Paint Approach Before the Finish Schedule Is Set
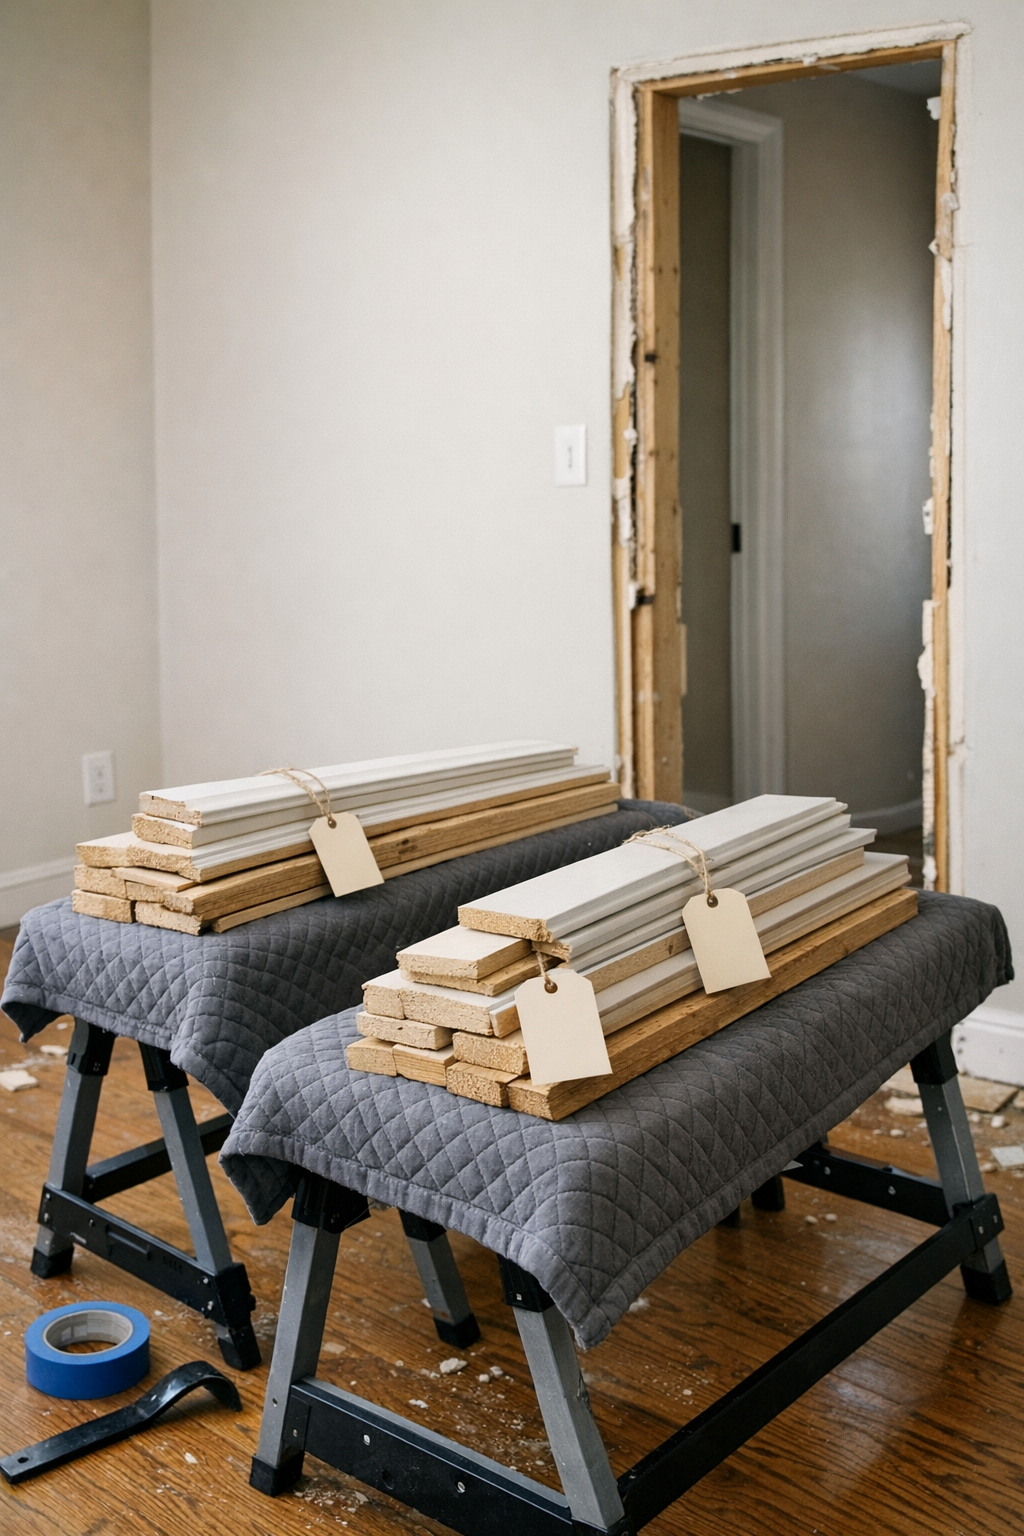
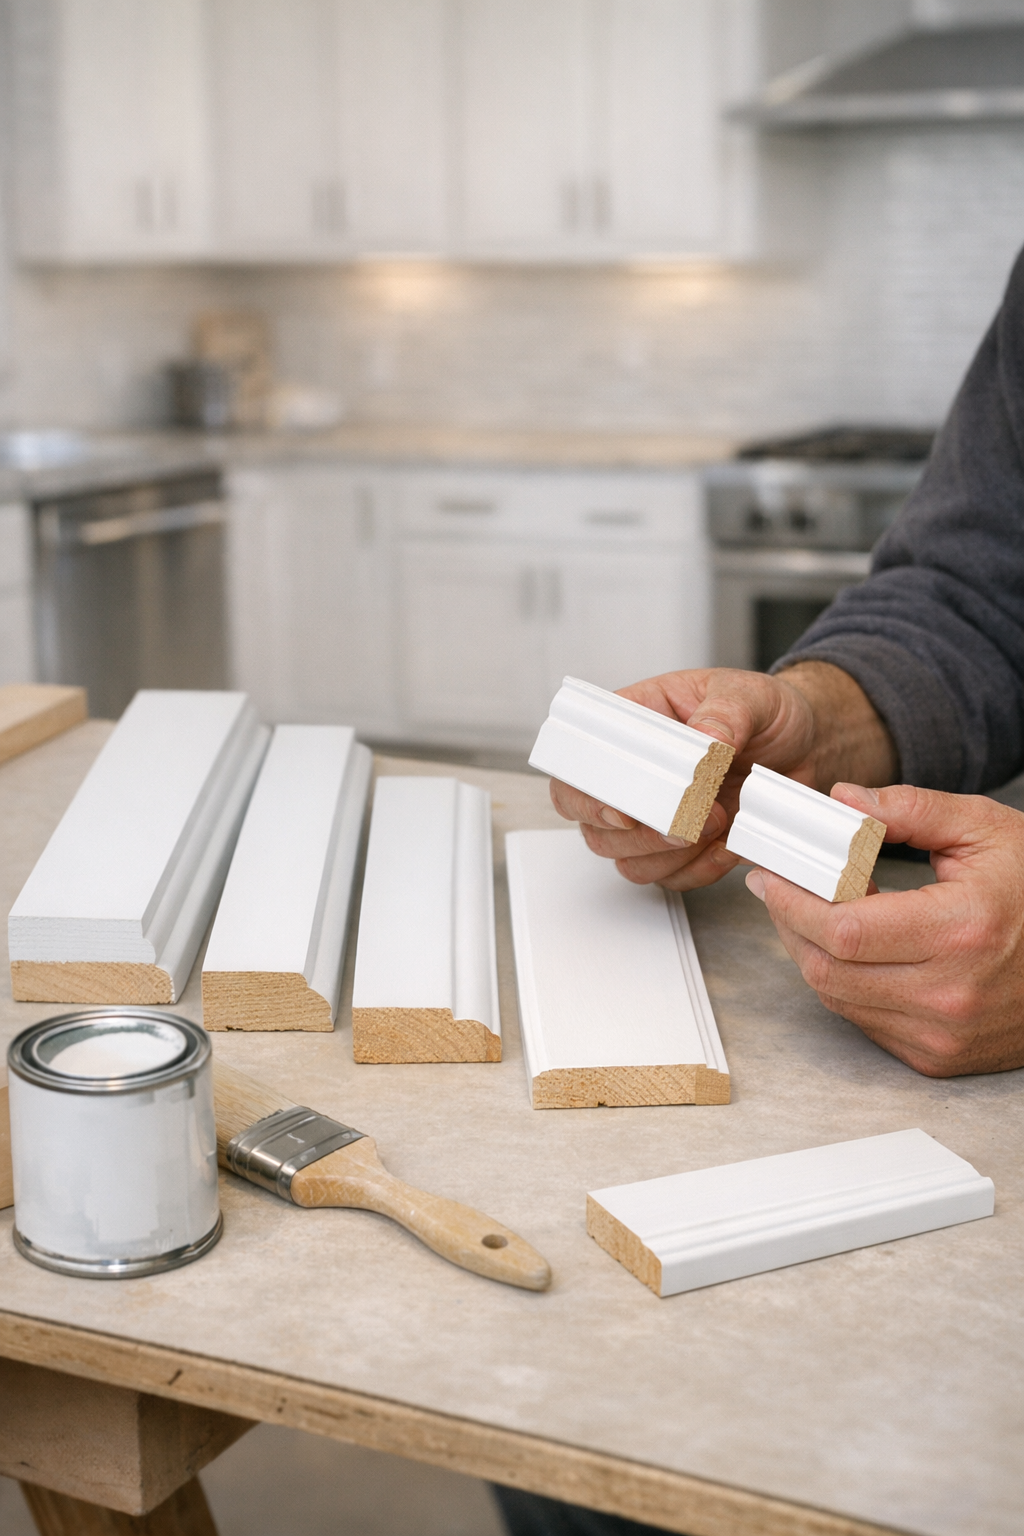
The next decision is not just what the trim looks like; it is how that choice affects ordering, installation, and paint. A stock profile that is already available is usually easier to place into the finish schedule than a profile that must be matched to an older room, coordinated with existing casing, or made to blend with crown that is staying. That is why profile selection belongs in finish carpentry planning before the painter and carpenter are given final dates.
Material choice changes the paint path. Pre-primed trim has a primer coat on it before it reaches the job, so it can move toward paint-ready trim faster after cutting, fastening, filling, and caulking. Paint-grade trim is meant to be painted, so small filled nail holes and caulked seams are part of the expected finish process. Stain-grade trim is different because the wood grain, color, and joints remain visible; it usually needs more careful selection and finishing decisions before installation begins.
Pre-painted or factory-finished trim can reduce some on-site coating time, but it also raises the stakes for handling, cuts, and touch-ups. MDF baseboards, stained casing, and painted crown may each move through the schedule differently because the carpenter and painter are not preparing the same surface in the same way. Some crews prefer to prime or first-coat pieces before installation, while others plan the main coating after the trim is installed and caulked. The important part is deciding that approach before the finish dates are locked.
Matching existing profiles deserves special attention. If a new pantry opening needs casing that matches the hallway, or a kitchen baseboard has to tie into an adjoining living room, the sample should be selected early enough for the team to find a close match or decide where a transition will land. Waiting until the carpenter is ready to install can leave painters without paint-ready trim, cabinets without finished side details, or rooms partially complete while everyone waits on a profile decision.
A good planning signal is "5 1/4-inch paint-grade baseboards throughout, match existing door casing in the hall, stain the new office casing, and paint crown after install." A weak signal is "standard white trim is fine," because "standard" may mean different profiles, materials, and finishing steps to different trades. Clear selections keep trim work during remodel scheduling from becoming guesswork at the point when the project should be moving into finishes.
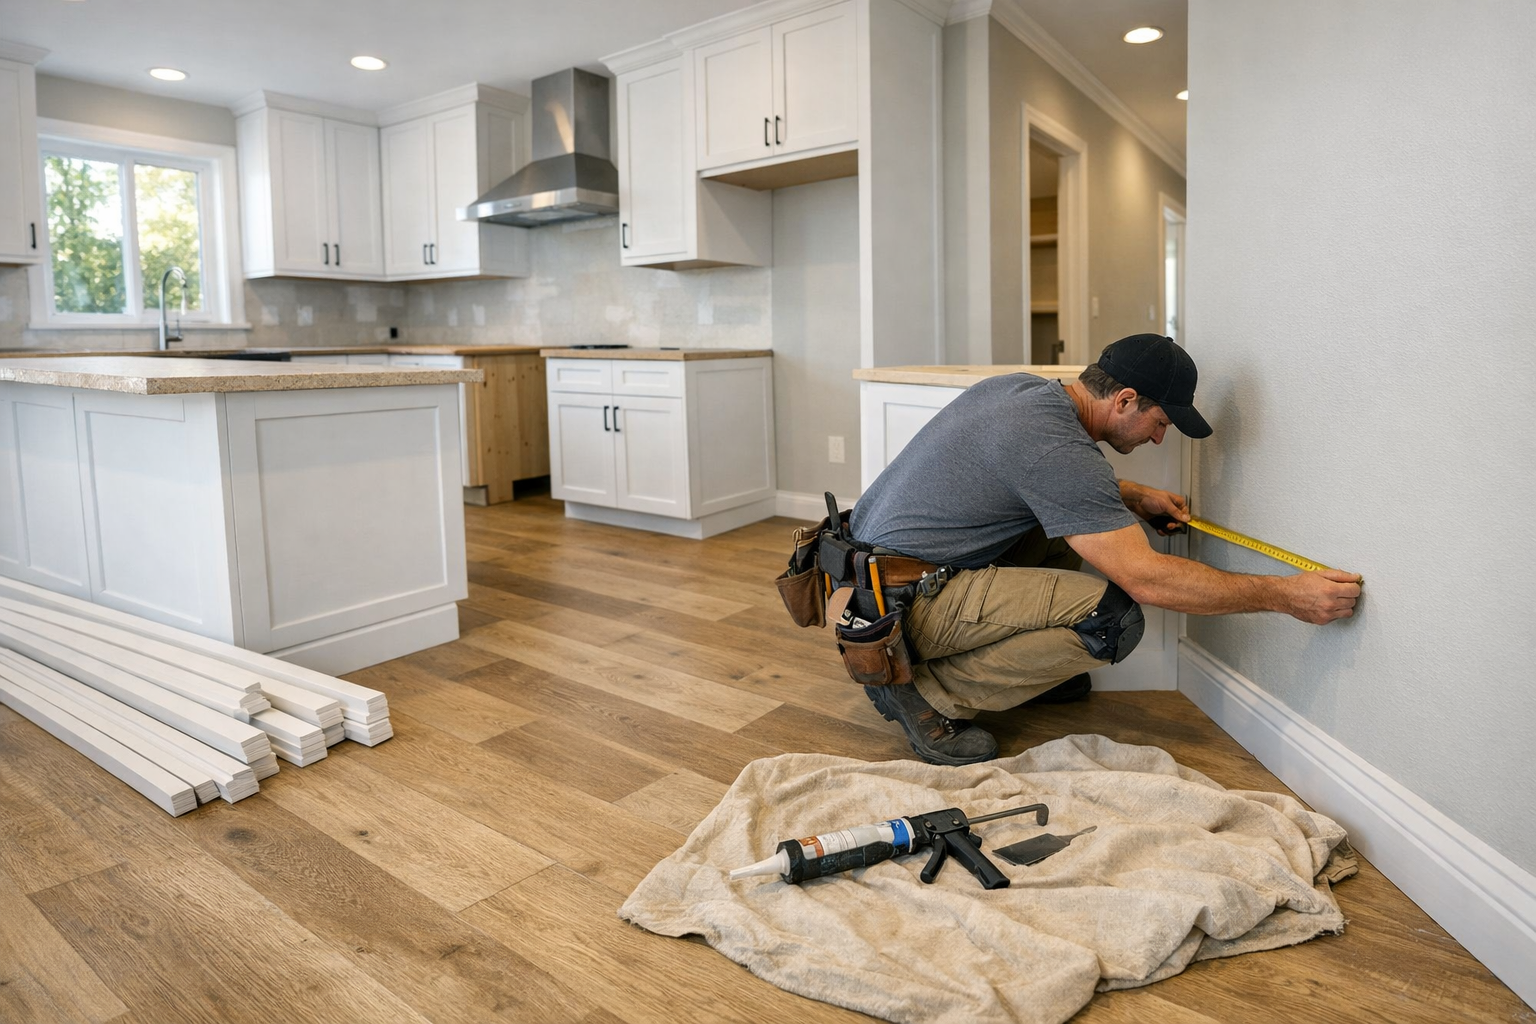
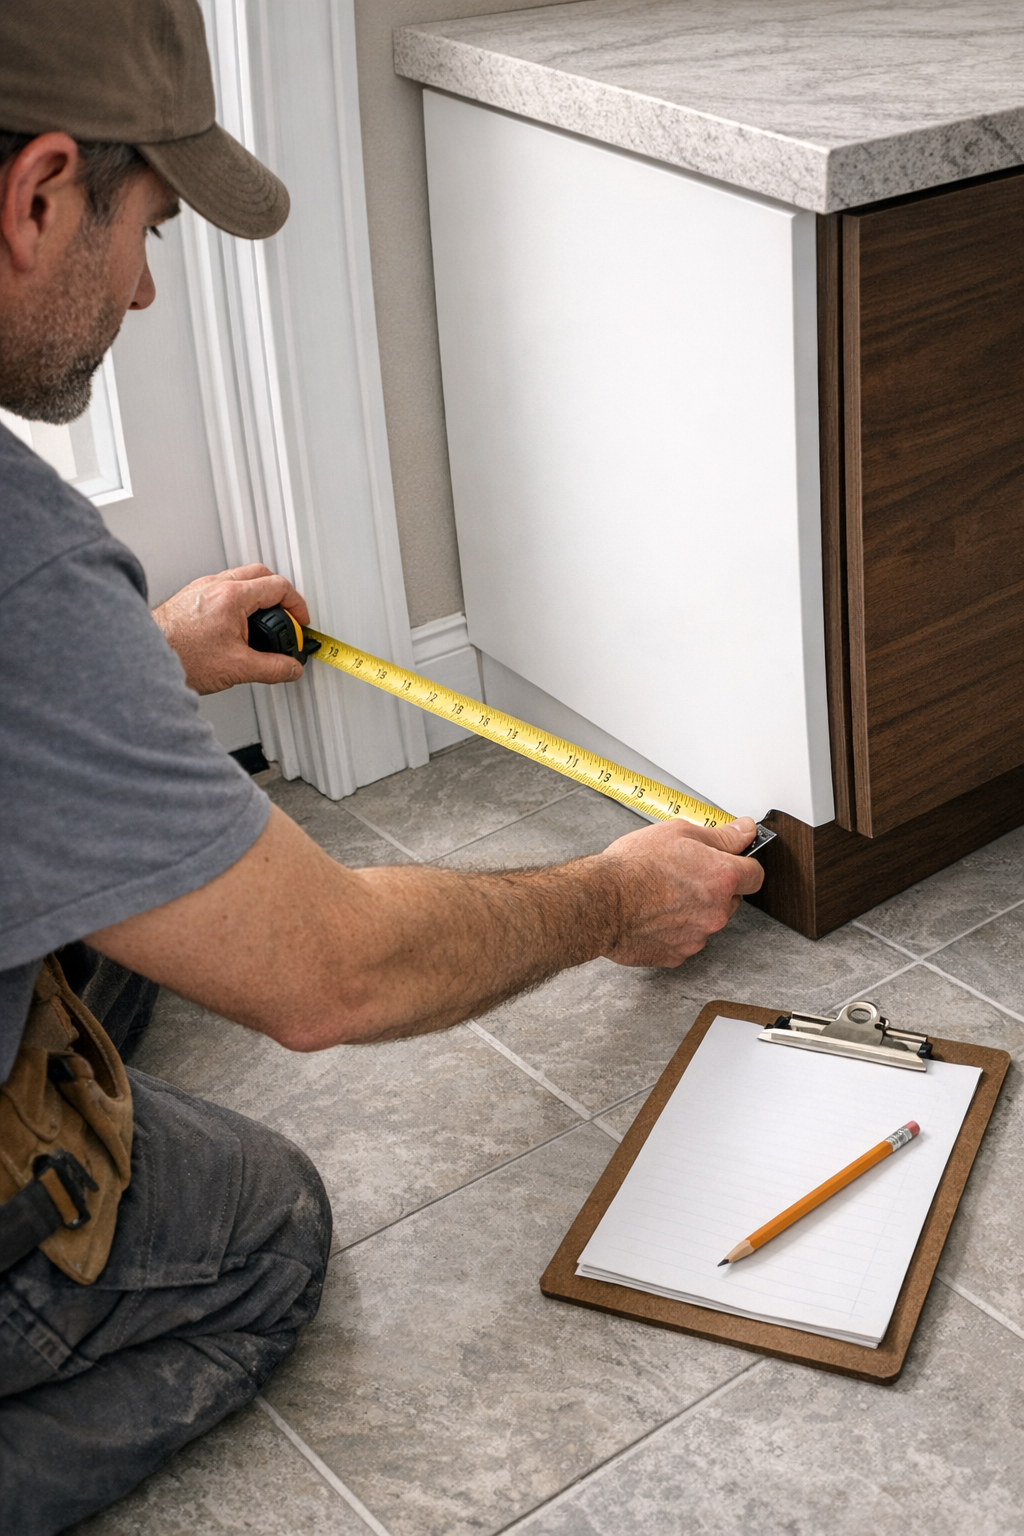
Step 3: Measure Trim After Walls, Openings, Cabinets, and Floor Heights Are Reliable
Selections can be made early, but measurements should happen in layers. A rough takeoff is an estimating number: count rooms, approximate wall runs, doors, windows, and waste so the budget is not a surprise. A final cut list is different. It tells the carpenter what lengths to order or cut, where casing returns stop, where baseboards die into cabinets, and where pieces need to change direction or profile.
For remodel trim installation, the best final measurements usually come after the surfaces that control trim are reliable. Drywall repair can change the face of a wall, patched corners can alter inside and outside measurements, new door jambs can change casing widths, and adjusted floor heights can change how baseboards, shoe molding, and flooring transitions line up. Measuring before those items settle can turn a clean cut list into a pile of short pieces and awkward gaps.
A practical sequence is: use rough measurements during estimating, field-measure again after major wall and opening work, then do a final check before ordering specialty material or cutting finished pieces. That final check should include room dimensions, door and window openings, cabinet endpoints, flooring thickness, transition locations, and the selected trim profile. Each item changes either length, height, reveal, or where the trim should stop.
A good planning signal is "measure baseboards after flooring height is known, measure casing after new jambs are installed, and confirm kitchen runs after cabinet layout is marked." A weak signal is "measure everything from the old trim before demo," because old pieces may not reflect new drywall repair, cabinet depth, doorway changes, or finished floor conditions. The takeaway is simple: budget early, but cut from current conditions.
Step 4: Coordinate Trim With Cabinets, Doors, and Built-Ins Before Installation Day
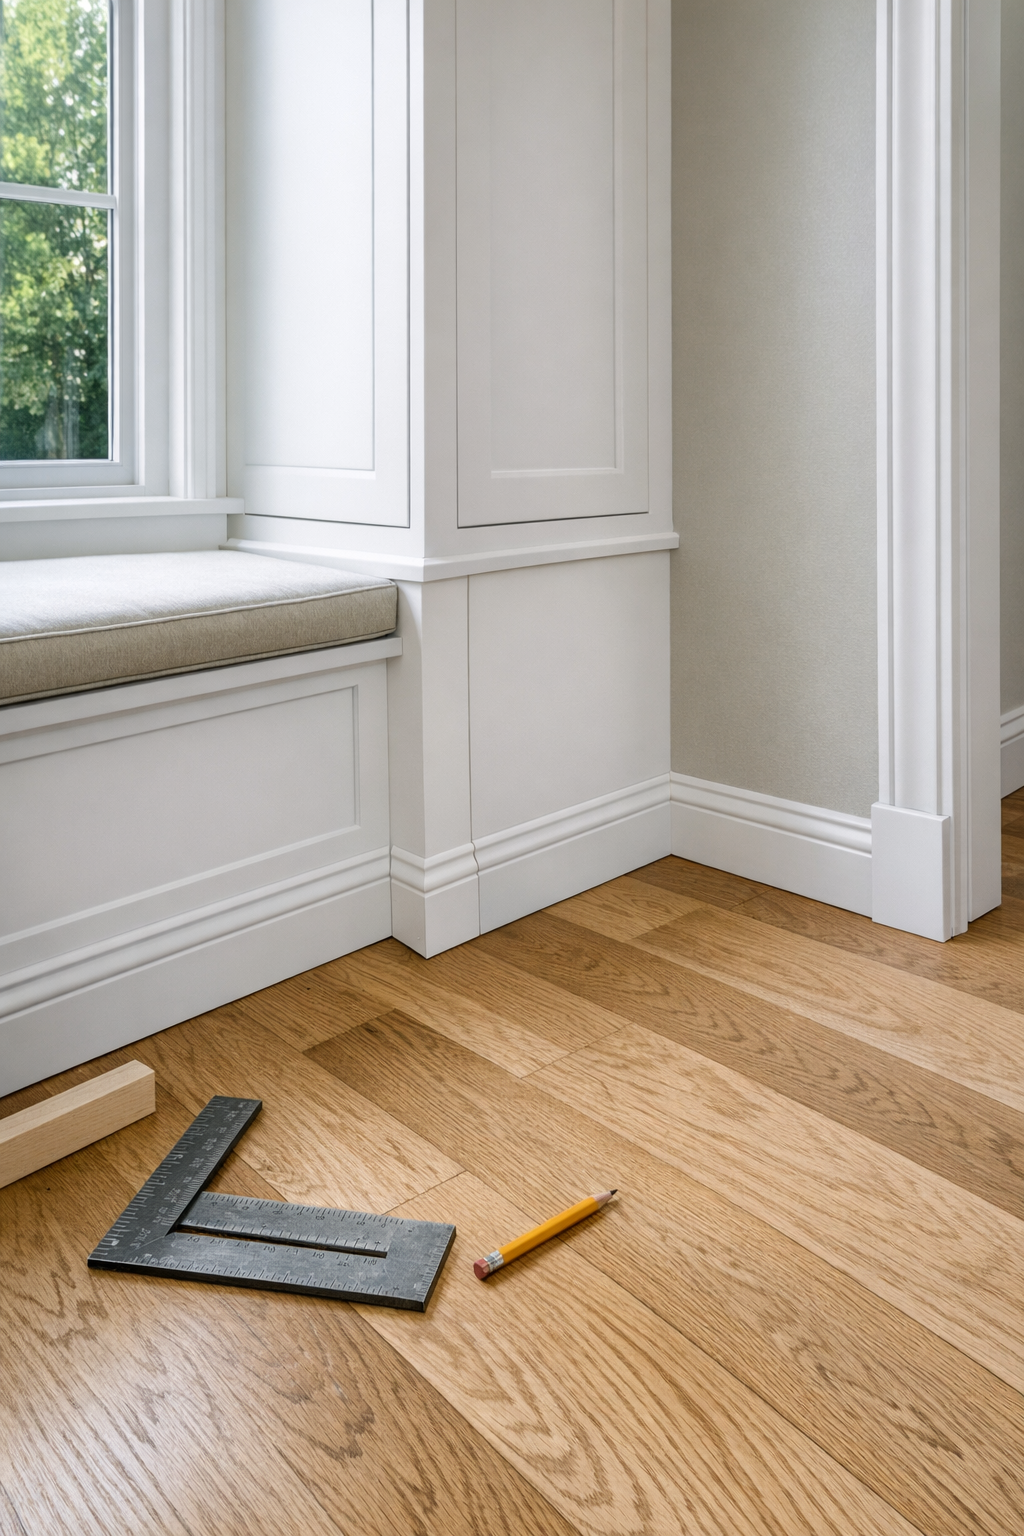
Before installation day, the cabinet plan should be treated as part of the trim plan, not a separate finish package. Kitchen base cabinets, islands, pantry cabinets, bathroom vanities, and built-ins create endpoints where baseboards stop, return, or disappear behind cabinetry. If remodel trim work is installed before those cabinet locations are firm, the carpenter may have to cut out trapped trim, patch short runs, or create awkward little filler pieces where a clean return should have been planned.
A common approach is to set cabinets before installing the baseboard pieces that die into them. That lets the baseboard terminate neatly against the cabinet side panel, island panel, pantry face, or vanity end. Cabinet scribe molding is different: it is a small trim piece used to close uneven gaps between a cabinet and a wall, floor, or adjacent surface, so it usually makes sense after cabinets are leveled and fixed in place. A toe kick is the recessed lower trim or panel at the bottom of many cabinets; because it follows the installed cabinet line, it is usually handled with or after cabinet installation rather than treated like room baseboard.
Doors need the same coordination. Door casing frames the opening, while jamb extensions build out the door frame when the wall thickness or finish plane requires it. If a new interior door, pocket door, pantry opening, or cased opening is not fully resolved, final baseboard cuts and wall paint touch-ups can land in the wrong place. The clean sequence is to settle the door jamb and casing condition first, then run baseboard into that casing with the correct reveal and return.
Built-ins and crown deserve one more look before cutting. Crown returns are the small finished end cuts where crown molding stops instead of continuing around a room; they matter near cabinet towers, hood surrounds, bookcases, and ceiling-height storage. A good planning signal is "set vanity and pantry cabinets first, then install adjacent baseboard returns, scribe, toe kick, and crown stops." A weak signal is "trim the room first and fit cabinets later," because that often shifts the rework to the most visible edges.
Step 5: Plan Baseboards, Shoe Molding, and Quarter Round Around the Flooring Type
Flooring is the trim variable that changes the baseboard sequence the most. With hard-surface floors such as tile, hardwood, LVP, or laminate, many projects run cleaner with baseboards after flooring because the trim can sit over the finished floor edge instead of guessing at the final height. That helps avoid a thin shadow line under the trim, a baseboard that looks buried, or a last-minute need to add extra molding just to hide an uneven gap.
Floating floors add another planning point. These floors are designed to sit as a connected surface rather than being fastened through every plank, so the edge condition matters. The perimeter gap is usually hidden by baseboard, shoe molding, or quarter round, which means the trim plan should leave enough room for the flooring installer to complete the floor and enough coverage for the carpenter to finish the edge neatly. If the baseboard is installed too early and tight to the subfloor, the flooring crew may have to work around it or the final trim may not cover the edge the way everyone expected.
Carpet can be different. In some rooms, baseboards are installed before carpet so the carpet can tuck under the trim line near the tack strip. The right height depends on the carpet thickness, pad, tack strip placement, and the installer's preferred method. That is why a bedroom carpet phase may not follow the same order as a kitchen tile phase, even in the same remodel.
Shoe molding and quarter round are small trim pieces used where the floor meets the baseboard. Shoe molding is typically slimmer and less bulky, while quarter round has a fuller rounded profile. Either can cover small floor-edge gaps, help bridge minor floor unevenness, or allow existing baseboards to stay in place when new flooring is installed. The tradeoff is visual: adding a second trim layer can look intentional when planned, but it can look like a patch if it is chosen only after gaps appear.
A good planning signal is "install tile and LVP first, then set baseboards after flooring, use shoe molding only where needed at existing trim, and coordinate carpet rooms separately." A weak signal is "put all the baseboards in now and let the flooring crew figure it out," because trim work during remodel sequencing should protect the flooring edge, the paint schedule, and the final look at the same time.
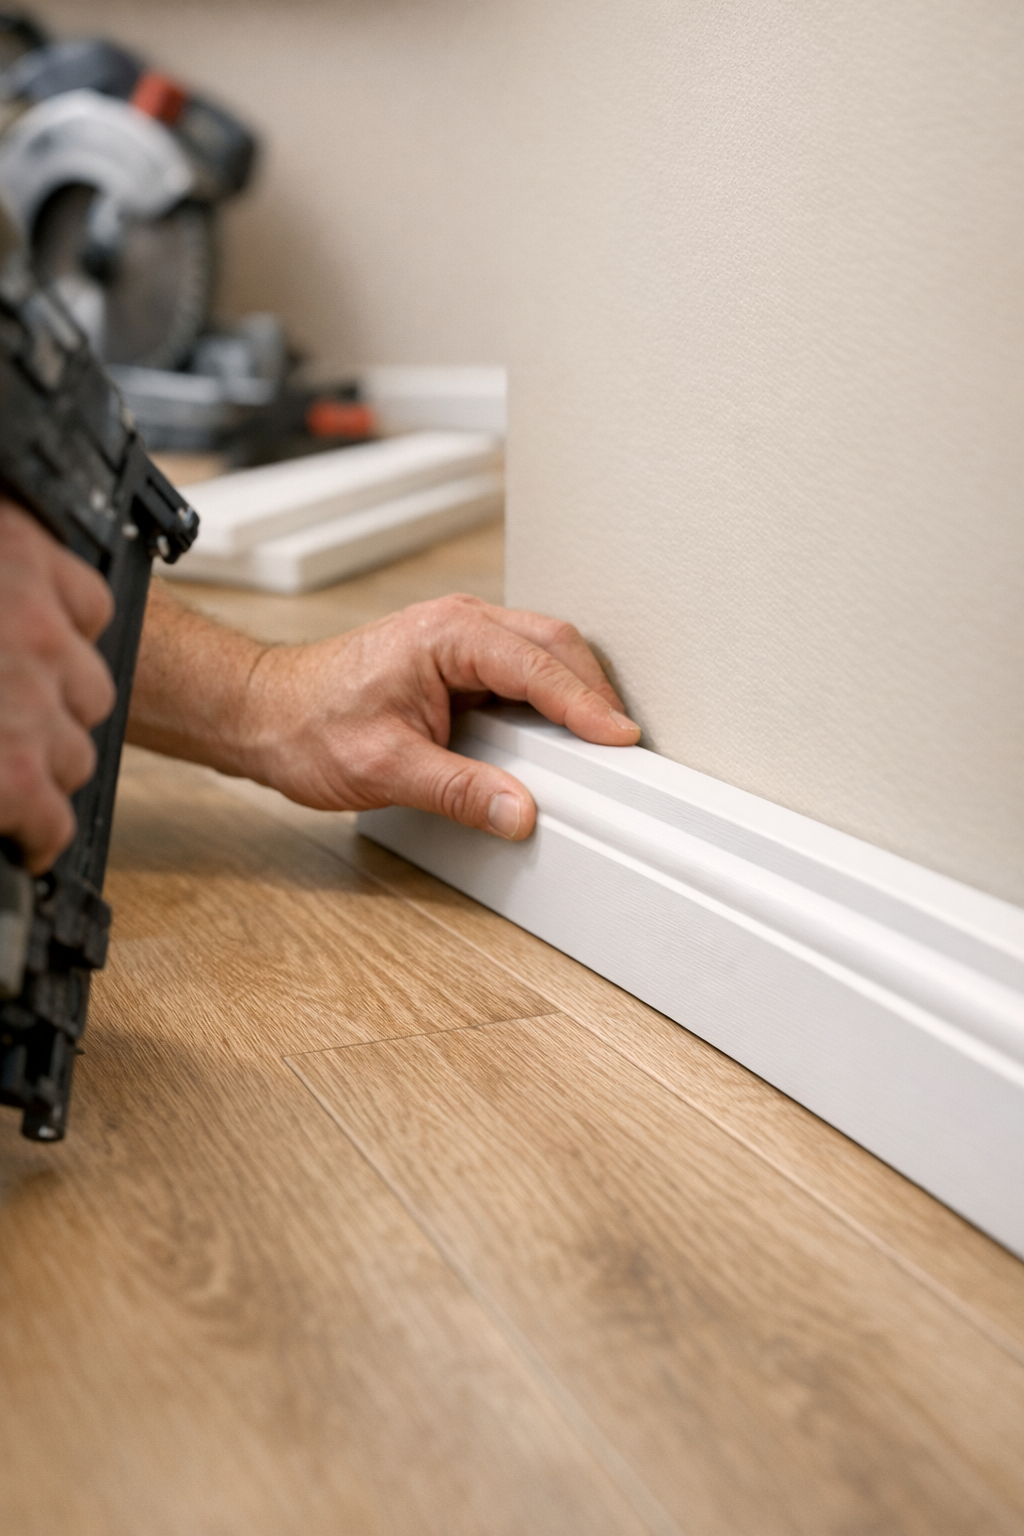
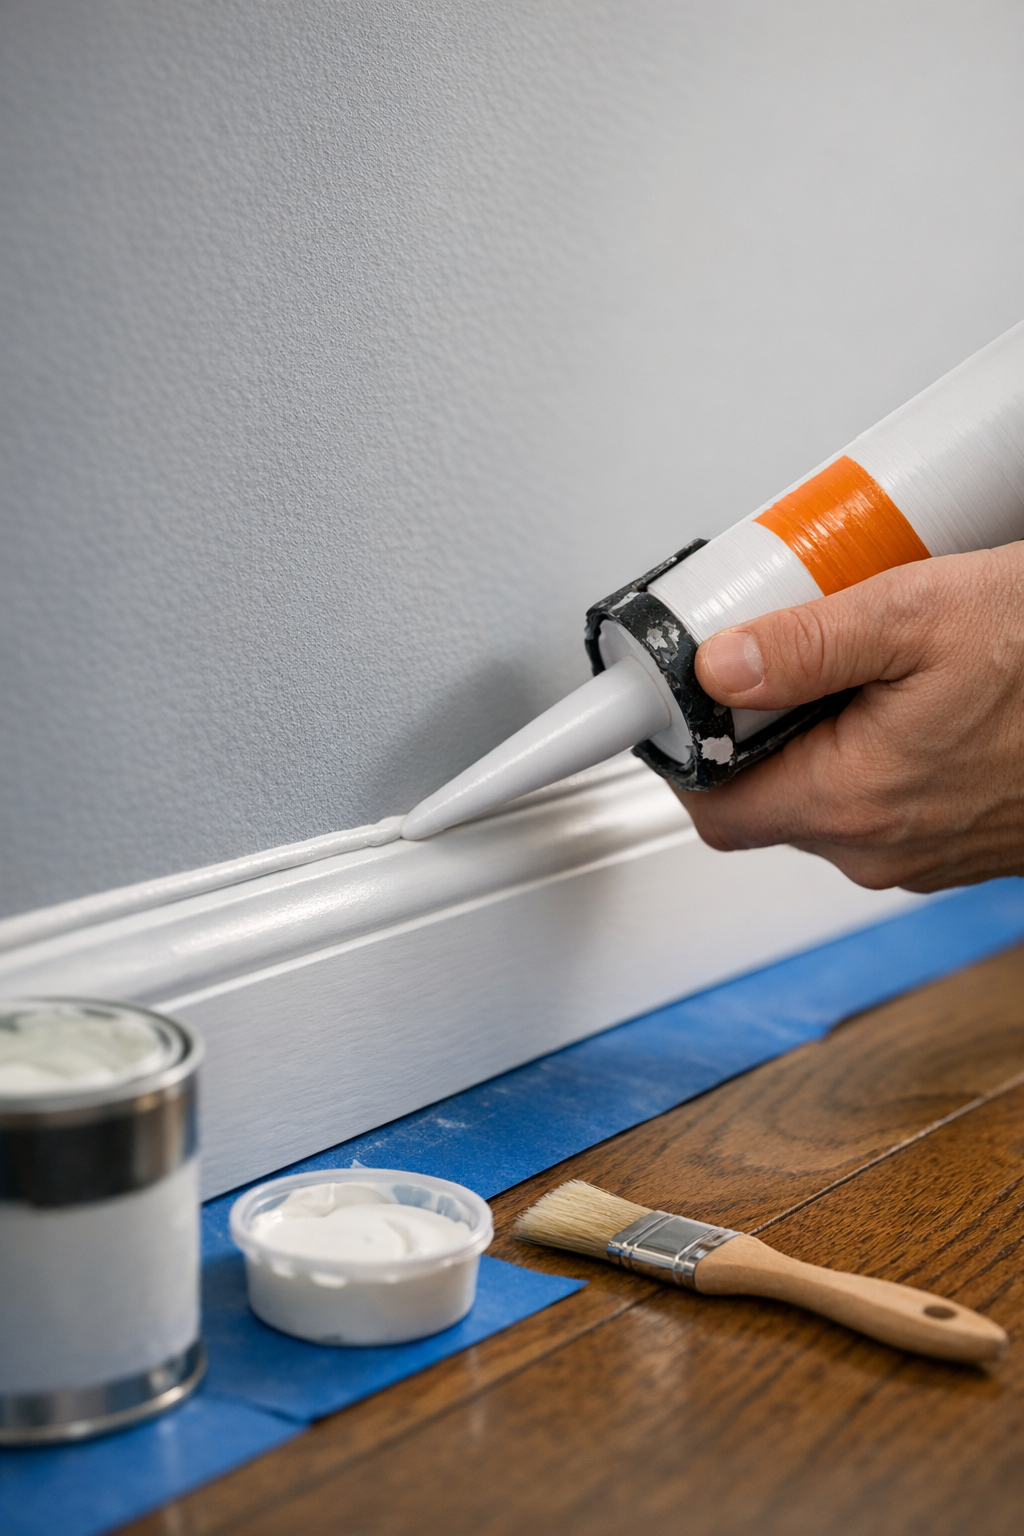
Step 6: Treat Caulking, Painting, and Touch-Ups as Their Own Scheduled Finish Phase
The last inch of trim planning is less about cutting wood and more about protecting the finish. Once baseboards, casing, crown, or shoe molding are installed, they are not automatically paint-ready trim. The finish phase usually includes filling nail holes, sanding filler smooth, caulking small seams where trim meets walls or other trim, priming raw cut edges, and applying the planned paint or finish coats.
This is where the carpenter-to-painter handoff needs to be clear. On some projects, the carpenter installs the trim and leaves it ready for the painter to fill, caulk, prime, and paint. On others, the carpenter may handle certain prep steps, such as setting fasteners or filling small imperfections, while the painter handles caulking and finish coats. The important point for the homeowner is not which trade "usually" does it; it is whether the agreement says who does each step and when.
- Ask who fills and sands fastener marks, because unfilled or rough spots can hold up final painting.
- Ask who handles caulking at wall joints, inside corners, casing edges, and crown seams, because those lines often decide whether the finished trim looks crisp or unfinished.
- Ask who primes raw ends, back-primed pieces if needed, or exposed cuts, because pre-primed trim can still have bare cut edges after installation.
- Ask who keeps the trim paint color and sheen labeled, because final touch-ups are easier when the correct product is already identified.
Final touch-ups should be scheduled after the main traffic is done: flooring installers have moved materials out, cabinets and built-ins are set, countertops are handled, and the major trim runs are complete. Painting too early may feel efficient, but freshly finished trim can get scuffed by tool bags, cabinet parts, ladders, flooring boxes, or appliance moves.
A good planning signal is "install trim, complete prep, paint the trim, protect it, then return for final touch-ups during the punch list." A weak signal is "paint it whenever there is an open day," because paint-ready trim still needs a scheduled finish window, not just leftover time at the end of the remodel.
Step 7: Build a Trim Schedule With Clear Trade Handoffs and a Final Punch List
Put the trim dates on the same calendar as the floors, cabinets, and paint, not in a separate note at the end. A practical trim schedule should show each handoff: what must be selected, what must be built or repaired first, when the finish carpentry contractor can measure, when trim can be installed, and when paint and punch-list touch-ups happen.
- Decide what is being reused, matched, modified, or replaced before demolition decisions are finalized.
- Select trim profiles, materials, and paint or stain approach early enough that ordering does not hold up finish work.
- Complete demolition, framing changes, drywall repairs, door adjustments, and cabinet layout decisions before relying on final measurements.
- Verify measurements after the wall, opening, cabinet, and floor-height conditions that control the trim are dependable.
- Install cabinets, built-ins, and flooring in the order that fits the project; baseboards often follow hard-surface flooring, while casing or crown may be handled on a different track.
- Install trim, then schedule filling, sanding, caulking, priming, painting, and final touch-ups as real finish tasks, not leftover time.
- Walk the punch list after major trade traffic is complete so scuffs, open seams, missed nail holes, and paint touch-ups are caught in one organized pass.
Before trim installation starts, the key dependencies to confirm are flooring type, cabinet scope, wall condition, door and window readiness, trim profile availability, and paint method. In whole-home remodeling, this matters even more because one room may be ready for casing while another is still waiting on flooring or cabinet work.
A strong schedule says, "Hall casing can start after door jambs are set; kitchen baseboards wait until cabinets and LVP are in; crown can be installed before final wall paint; touch-ups happen after appliance delivery." A weak schedule simply says, "Trim next week," without naming what has to be finished first.
Planning trim work during a remodel will not remove every variable, but it gives each trade a cleaner handoff and gives the homeowner a better way to spot trouble early. The goal is not a perfect script; it is a schedule flexible enough to adapt without turning baseboards, casing, crown, shoe molding, caulk, or paint into the reason the project stalls at the finish line.